Quick-Start Onboarding
- Install MCX – Marketing Cloud eXtension from AppExchange.
- Add MCX to your SFMC instance to enable integration.
- Book a provisioning session with the MCX team.
- Provisioning automatically creates necessary dependencies - including .js files and all required SFMC components. Users receive a 30-day trial period with full access.
- Create your first app in the MCX Dashboard.
- Initialize your push application, generating custom SDK and manifest links.
- Enter Server-to-Server Client ID and Secret with required scopes.
- Authorises background jobs for syncing engagement data and enables provisioning of Data Extensions, Automations, and Queries.
- Add the mcx-push.js and manifest.json references to your site’s <head>.
- Enables push notification SDK and Progressive Web App features for your website.
- Place the sw.js file at your domain root.
- Required for service worker registration and web push functionality.
- Customise notification prompts and enable install options in the MCX Dashboard.
- Personalize the opt-in experience and app branding.
- Building and activating a Journey with the MCX Push activity
- Set up the MCX Push activity in Journey Builder and activate it to send automated personalised web push notifications from your SFMC journeys.
Step 1: Start MCX Push Configuration
- Log in to your Salesforce Marketing Cloud account.
- From the AppExchange section, open the MCX Extension and select MCX Push from the app list to begin.
MCX Push automatically creates the necessary data extensions, automations, and SQL queries in the
themcx.app > Push folder structure. This process usually completes within a few seconds.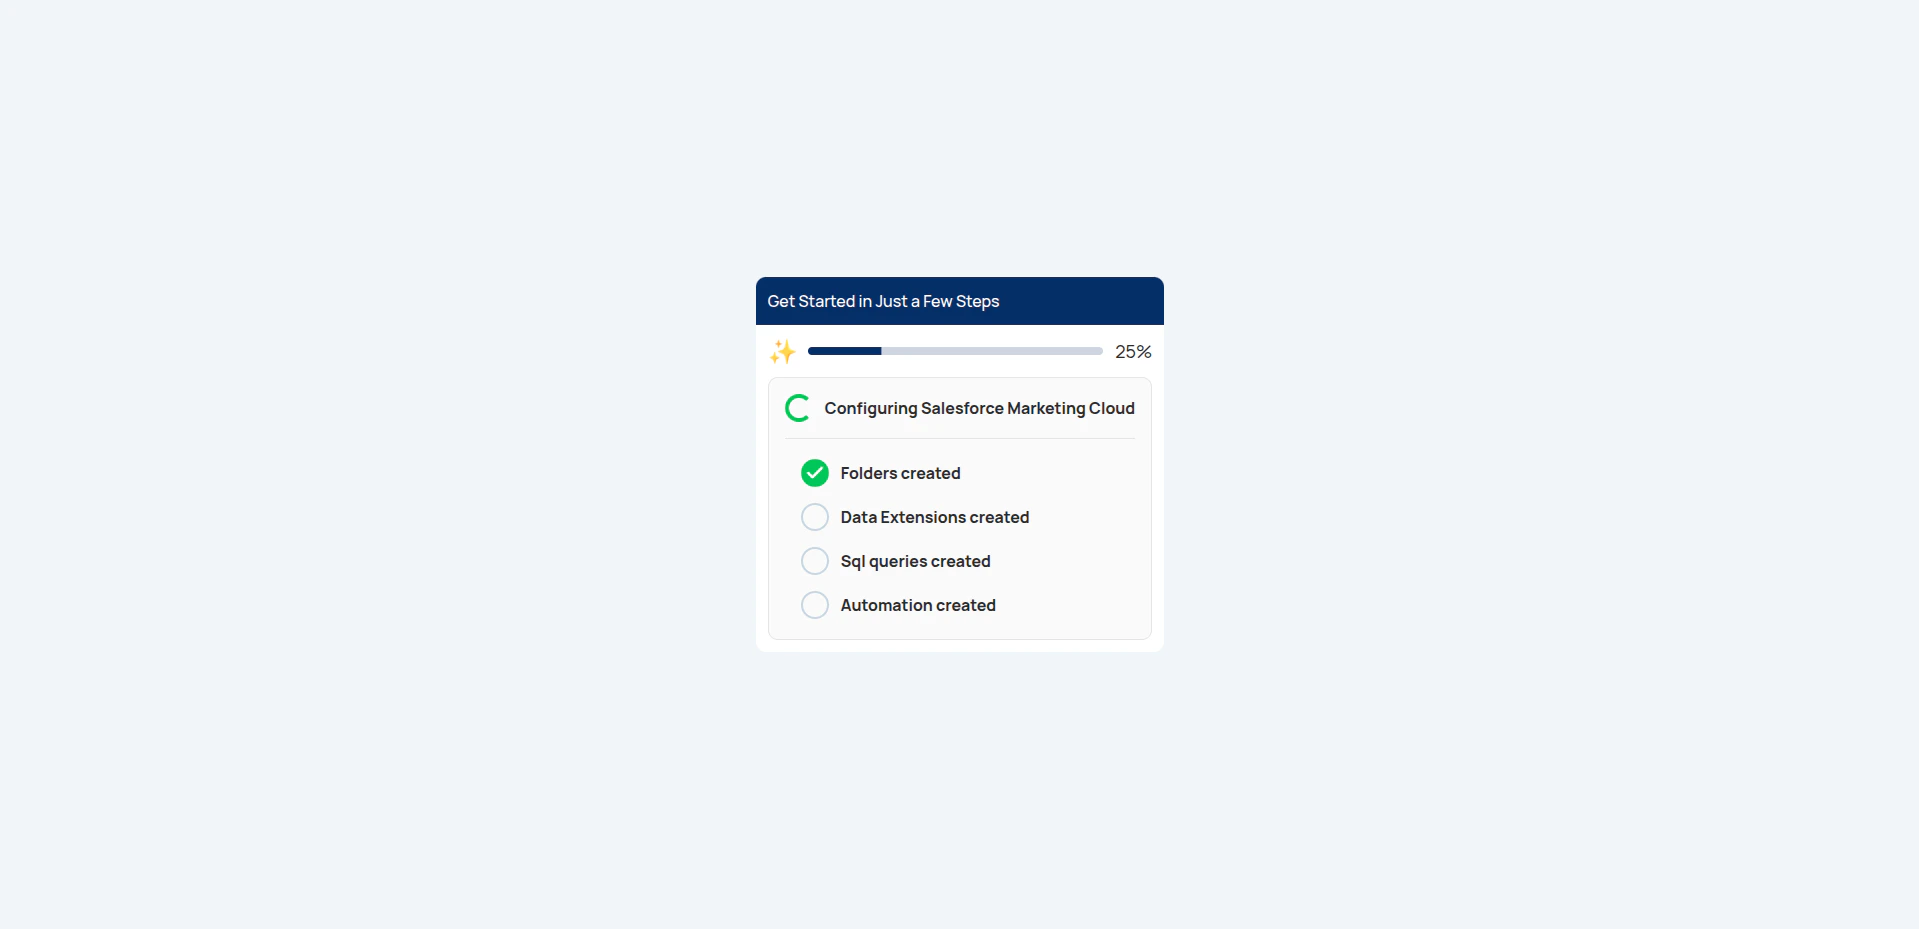
Step 2: Create your first app
Once onboarding is complete, the Create new app modal opens automatically.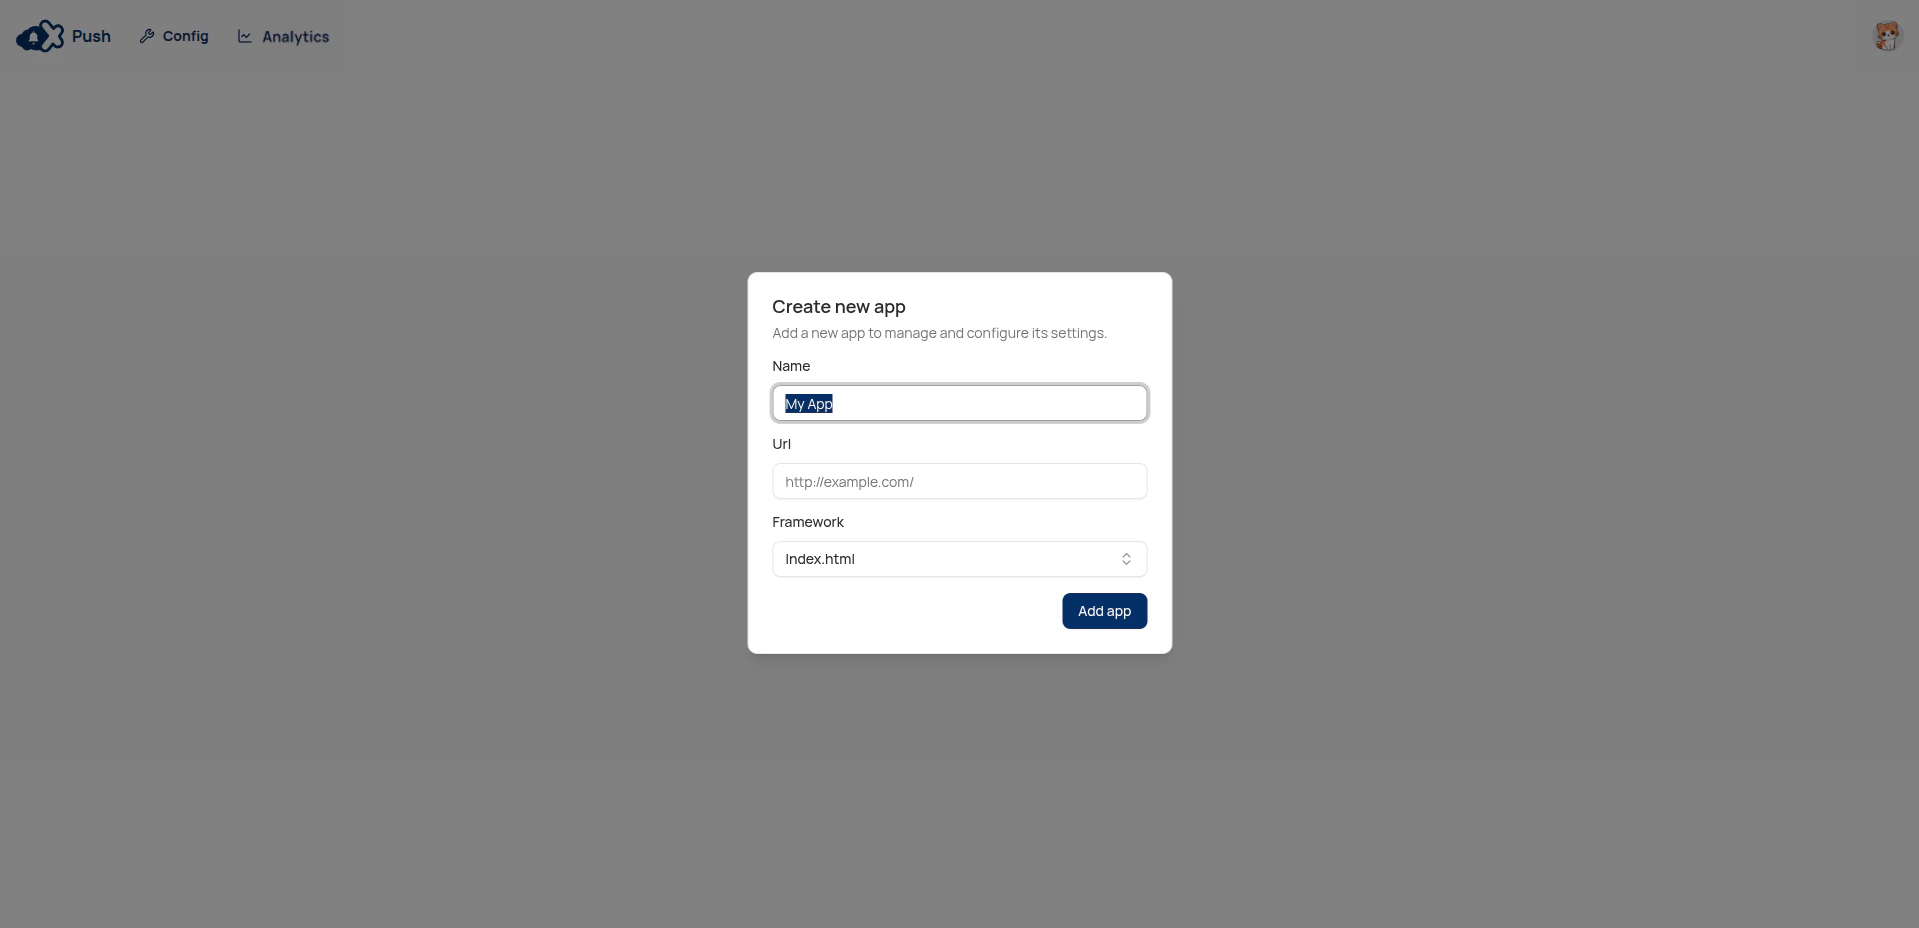
- Complete the required fields in the modal:
| Field | Description |
|---|---|
| Name | The display name for your application. |
| URL | The application’s domain where you want to send push notifications. |
| Framework | Select the primary front-end framework your website uses (e.g., index.html, Next.js, Astro). This tells MCX Push where you will inject the required push notification scripts and later in the setup process. |
The framework selection points to the main entry file. For most projects, this is index.html. Verify your project’s setup, as you may need to apply the manual code injection to a different file based on your chosen framework.
- Click Add app to finish. Your new app then appears in the MCX Push dashboard.
Step 3: Enter Server-to-Server Credentials
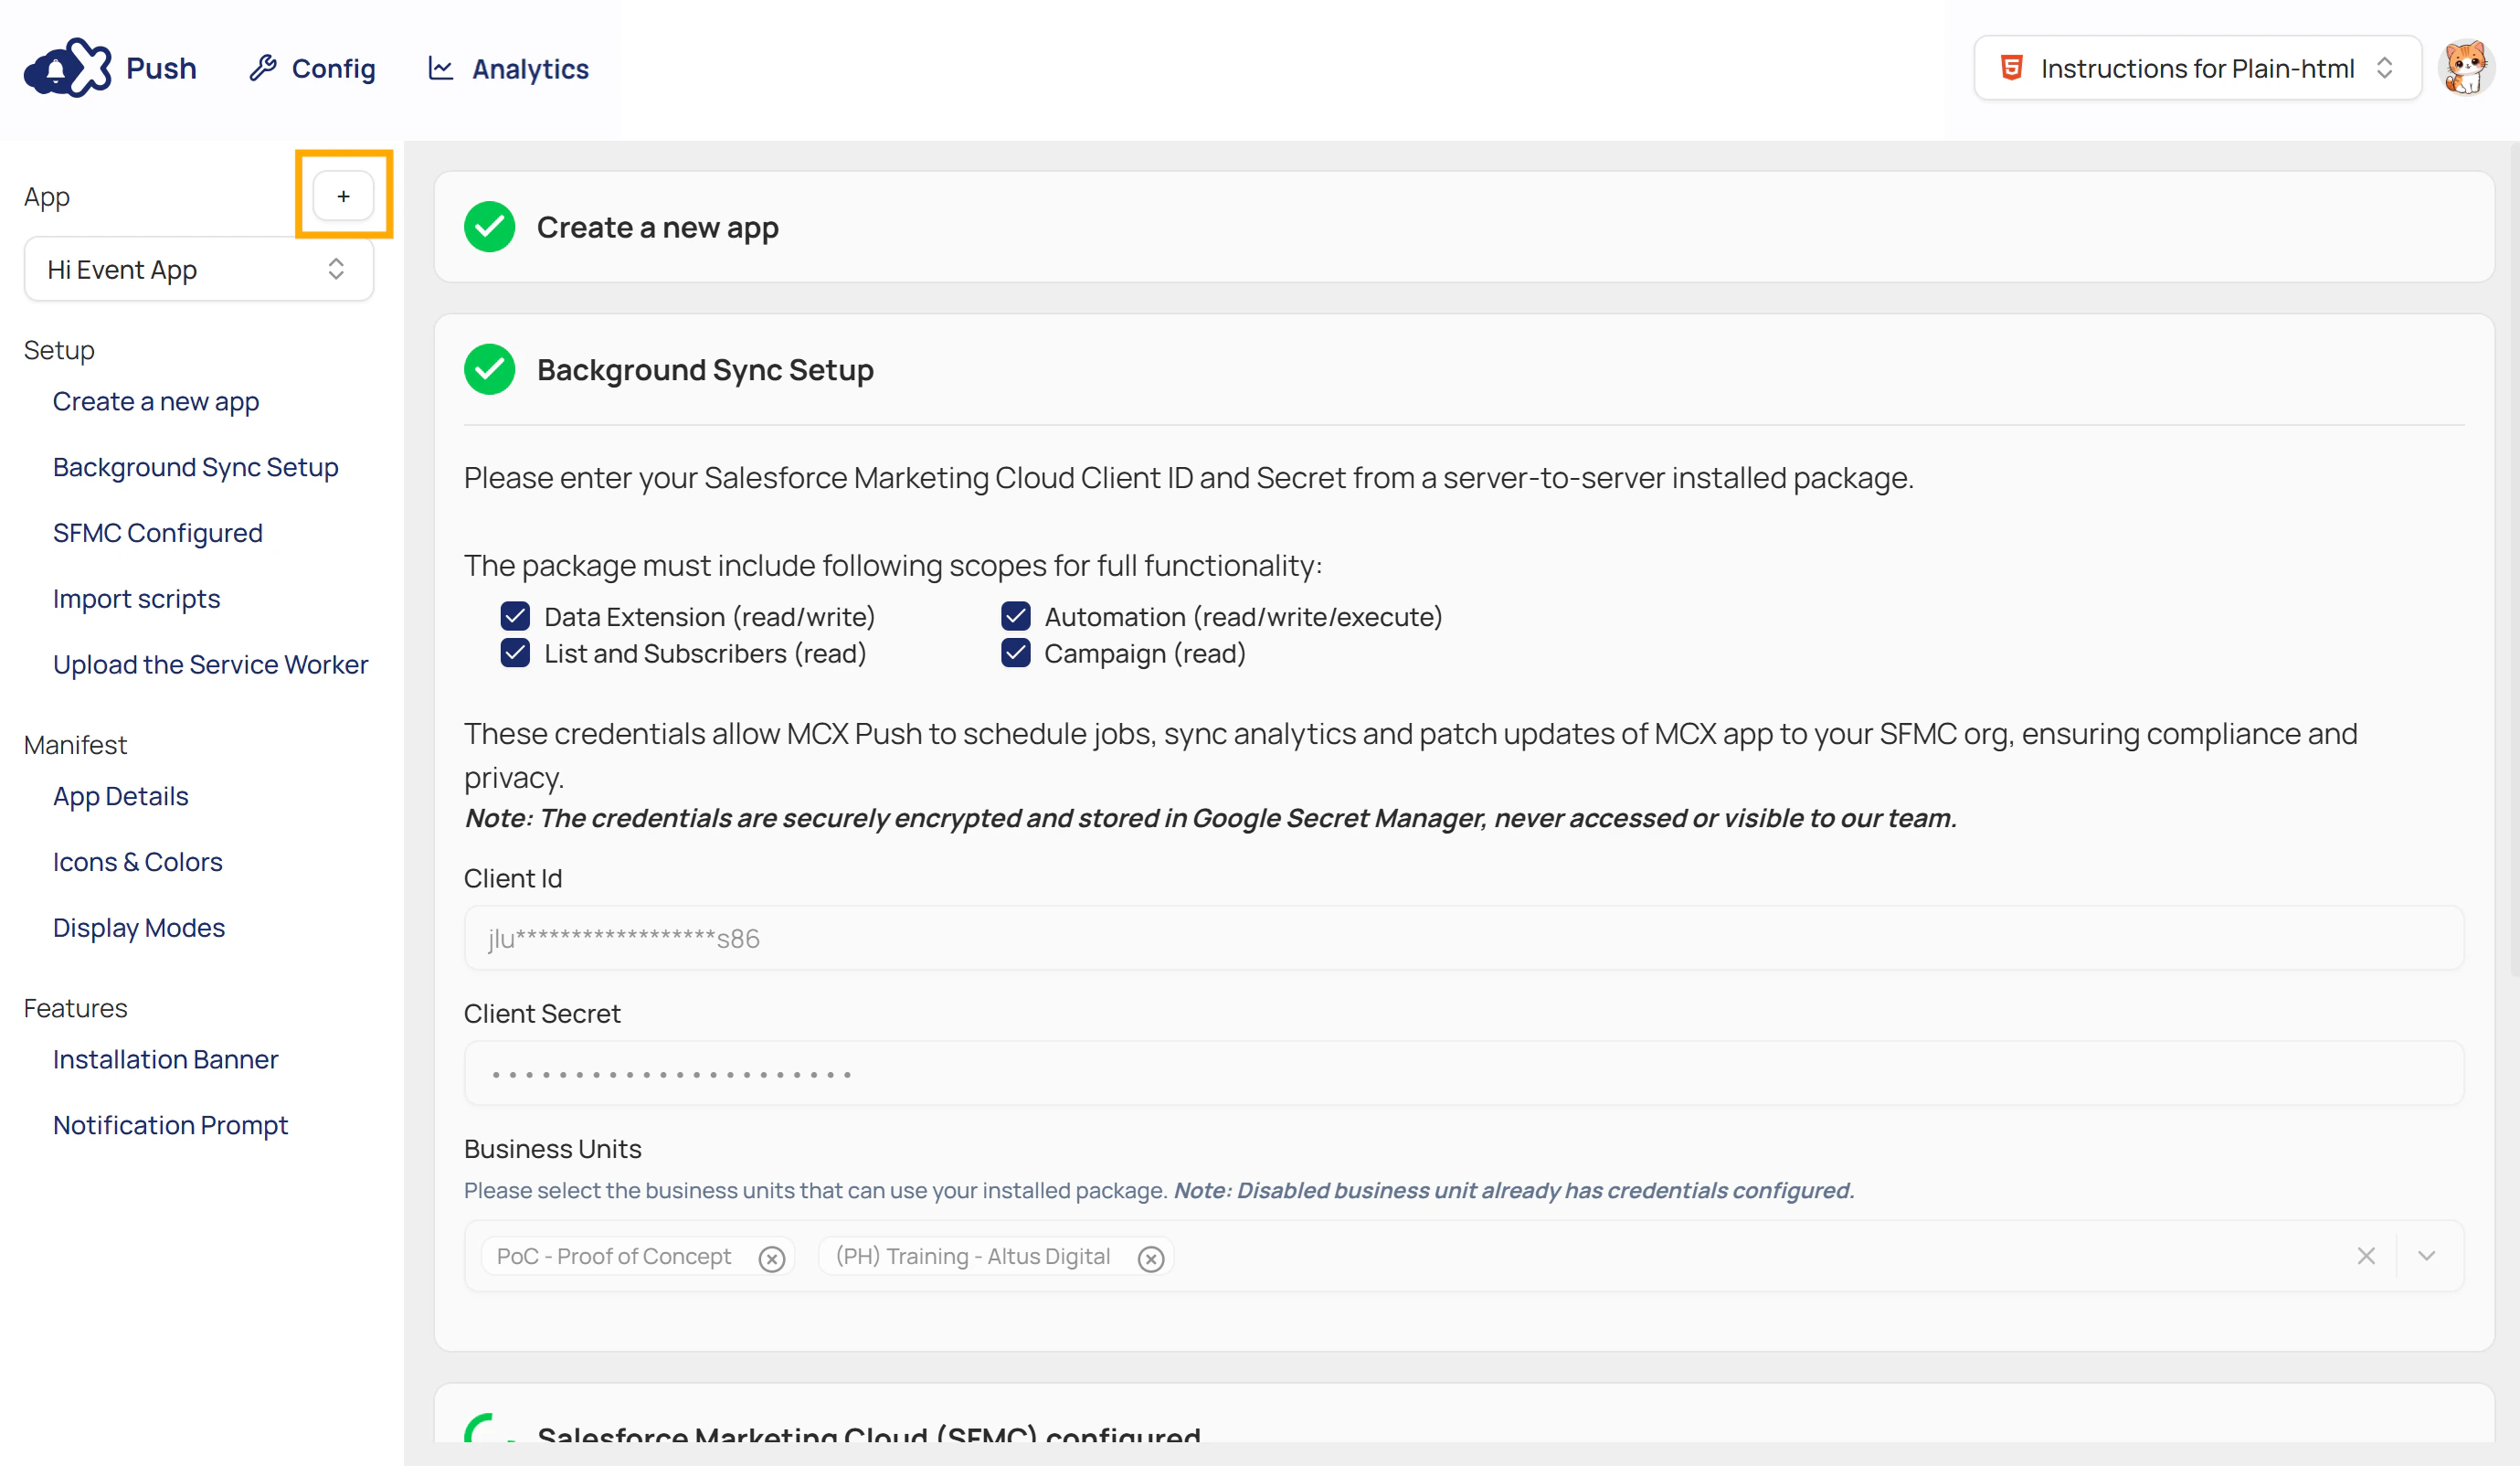
Your server-to-server credentials are stored in Google Cloud Secret Manager using managed encryption keys. No one, including MCX, can view your secrets. Our policy blocks manual access to all client secrets - only automated system jobs use them and are never visible or retrievable by anyone.
- Go to the Background Sync Setup section and follow the instructions to create a Server-to-Server installed package.
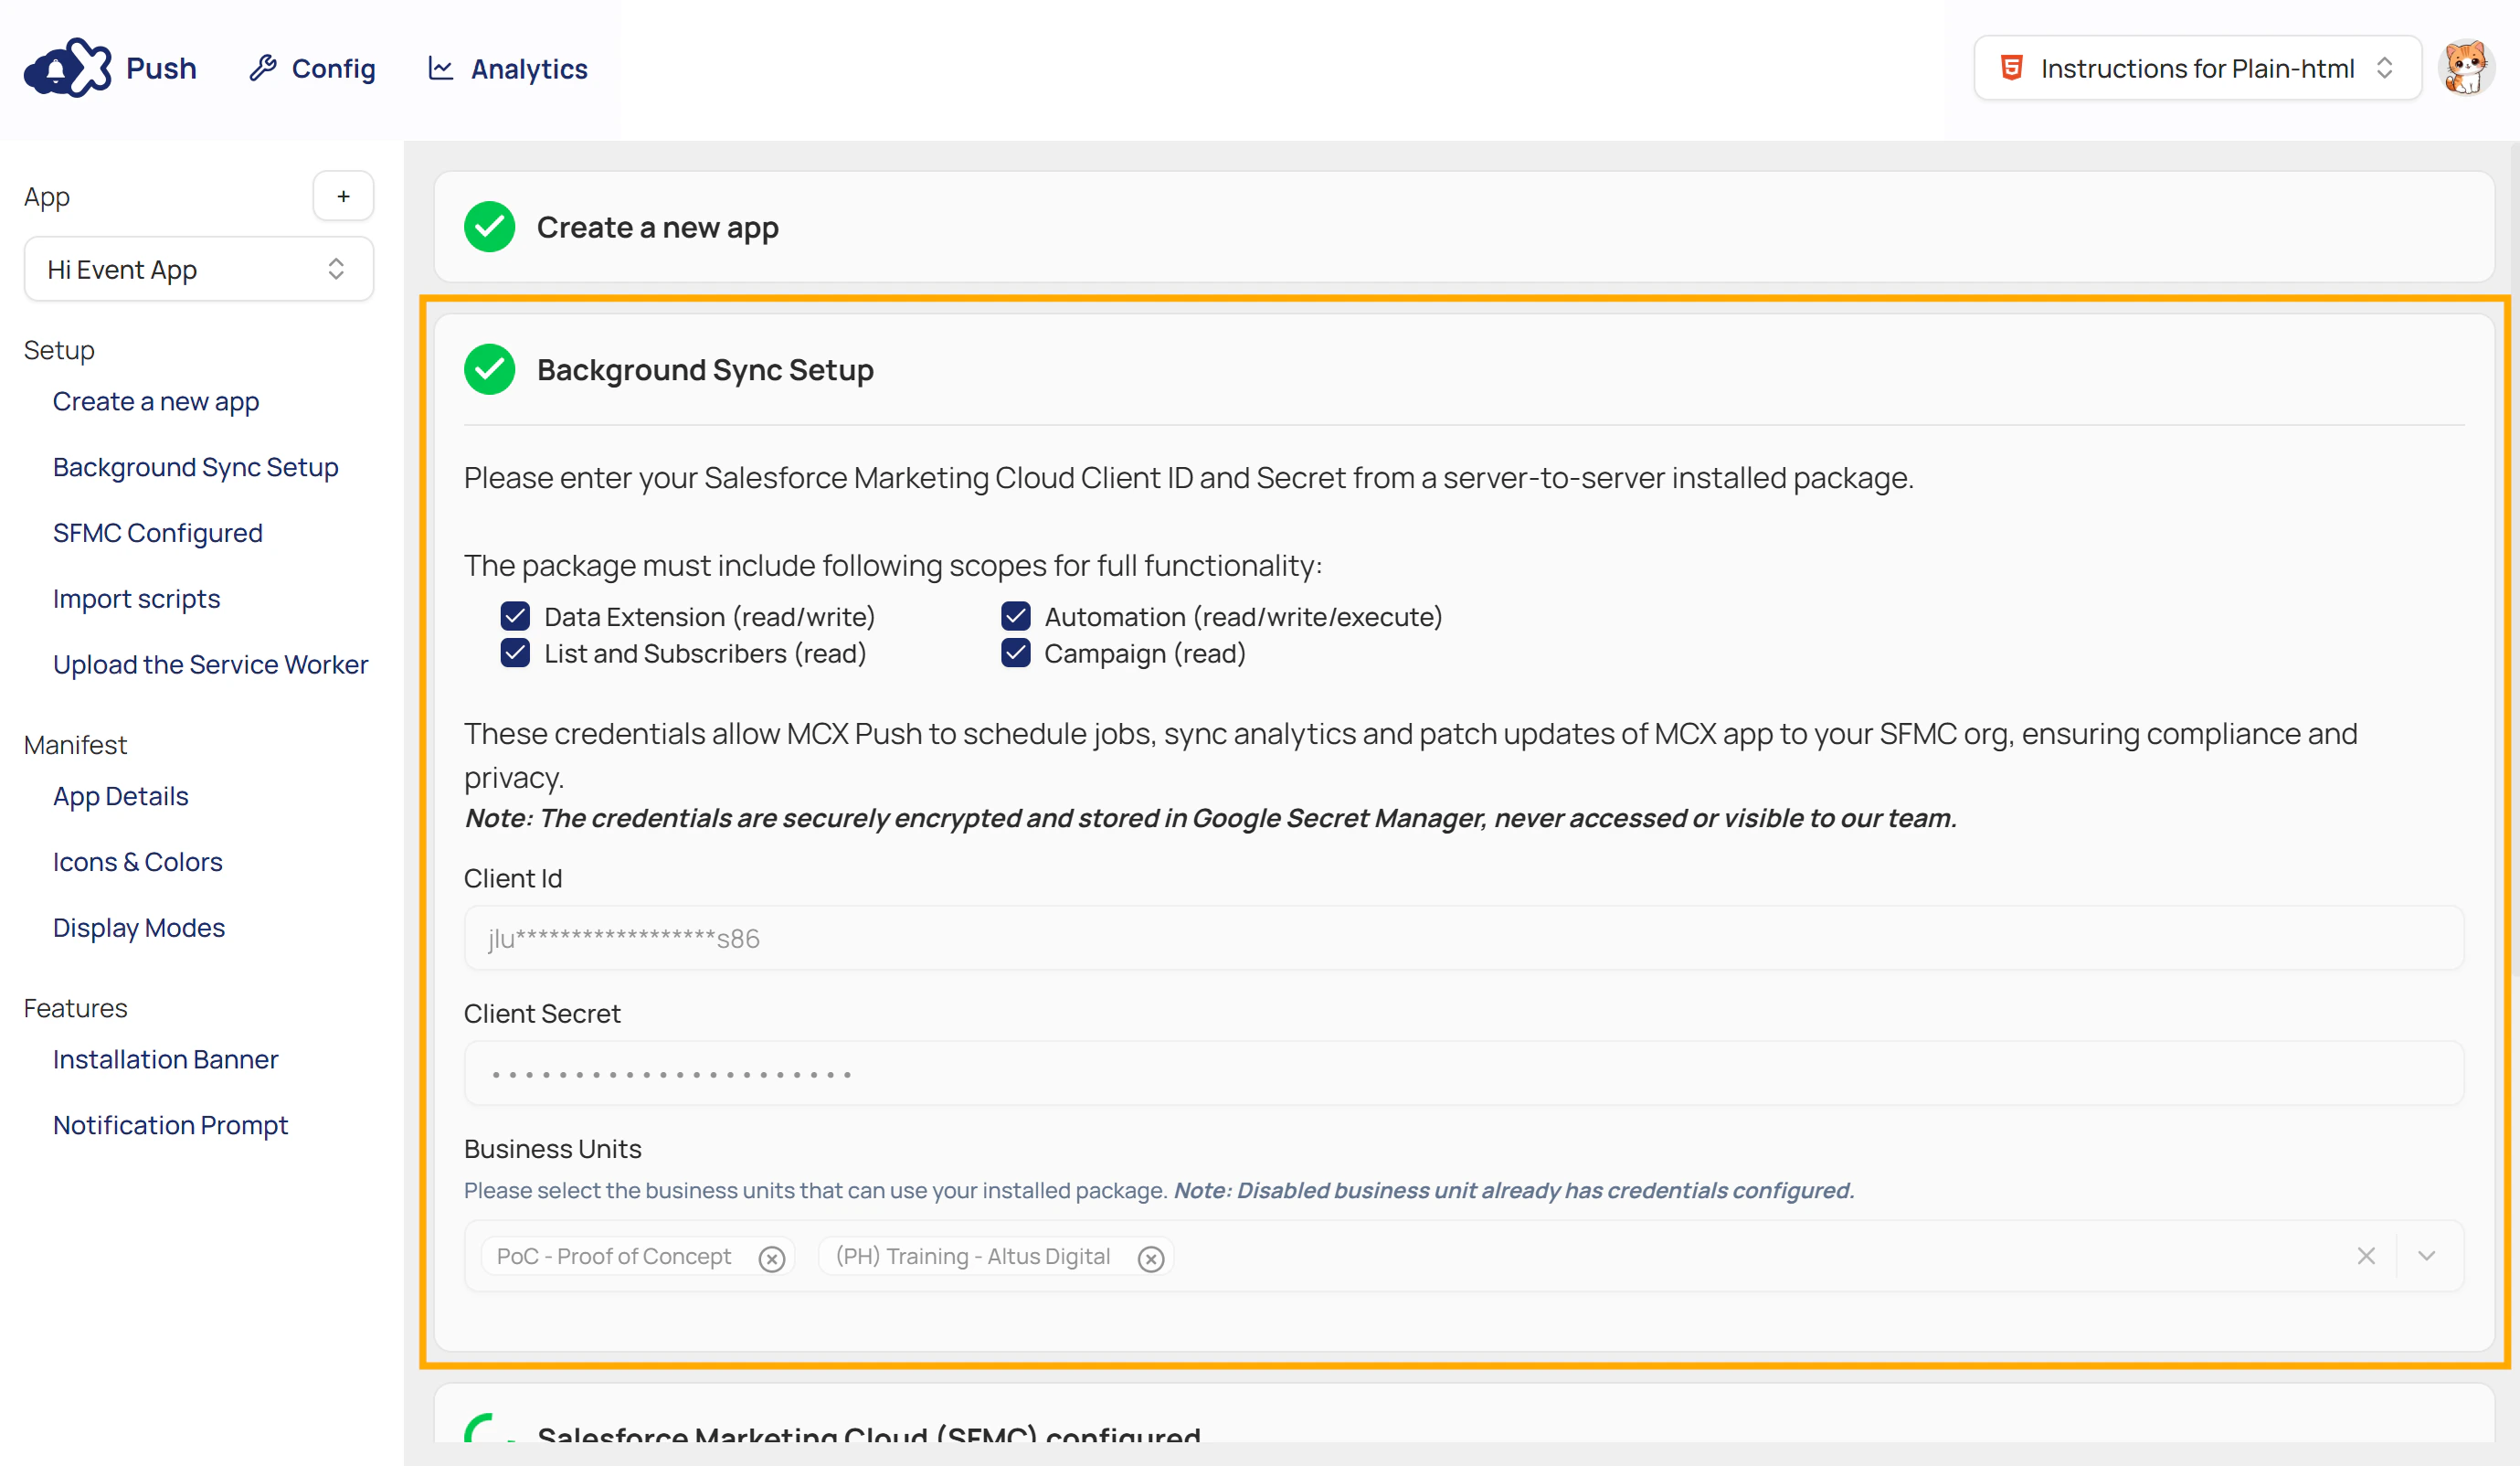
- Create a Server-to-Server installed package in Salesforce Marketing Cloud by navigating to
Setup > Apps > Installed Packages, and click New. - Add the required API Integration component with the Server-to-Server integration type.
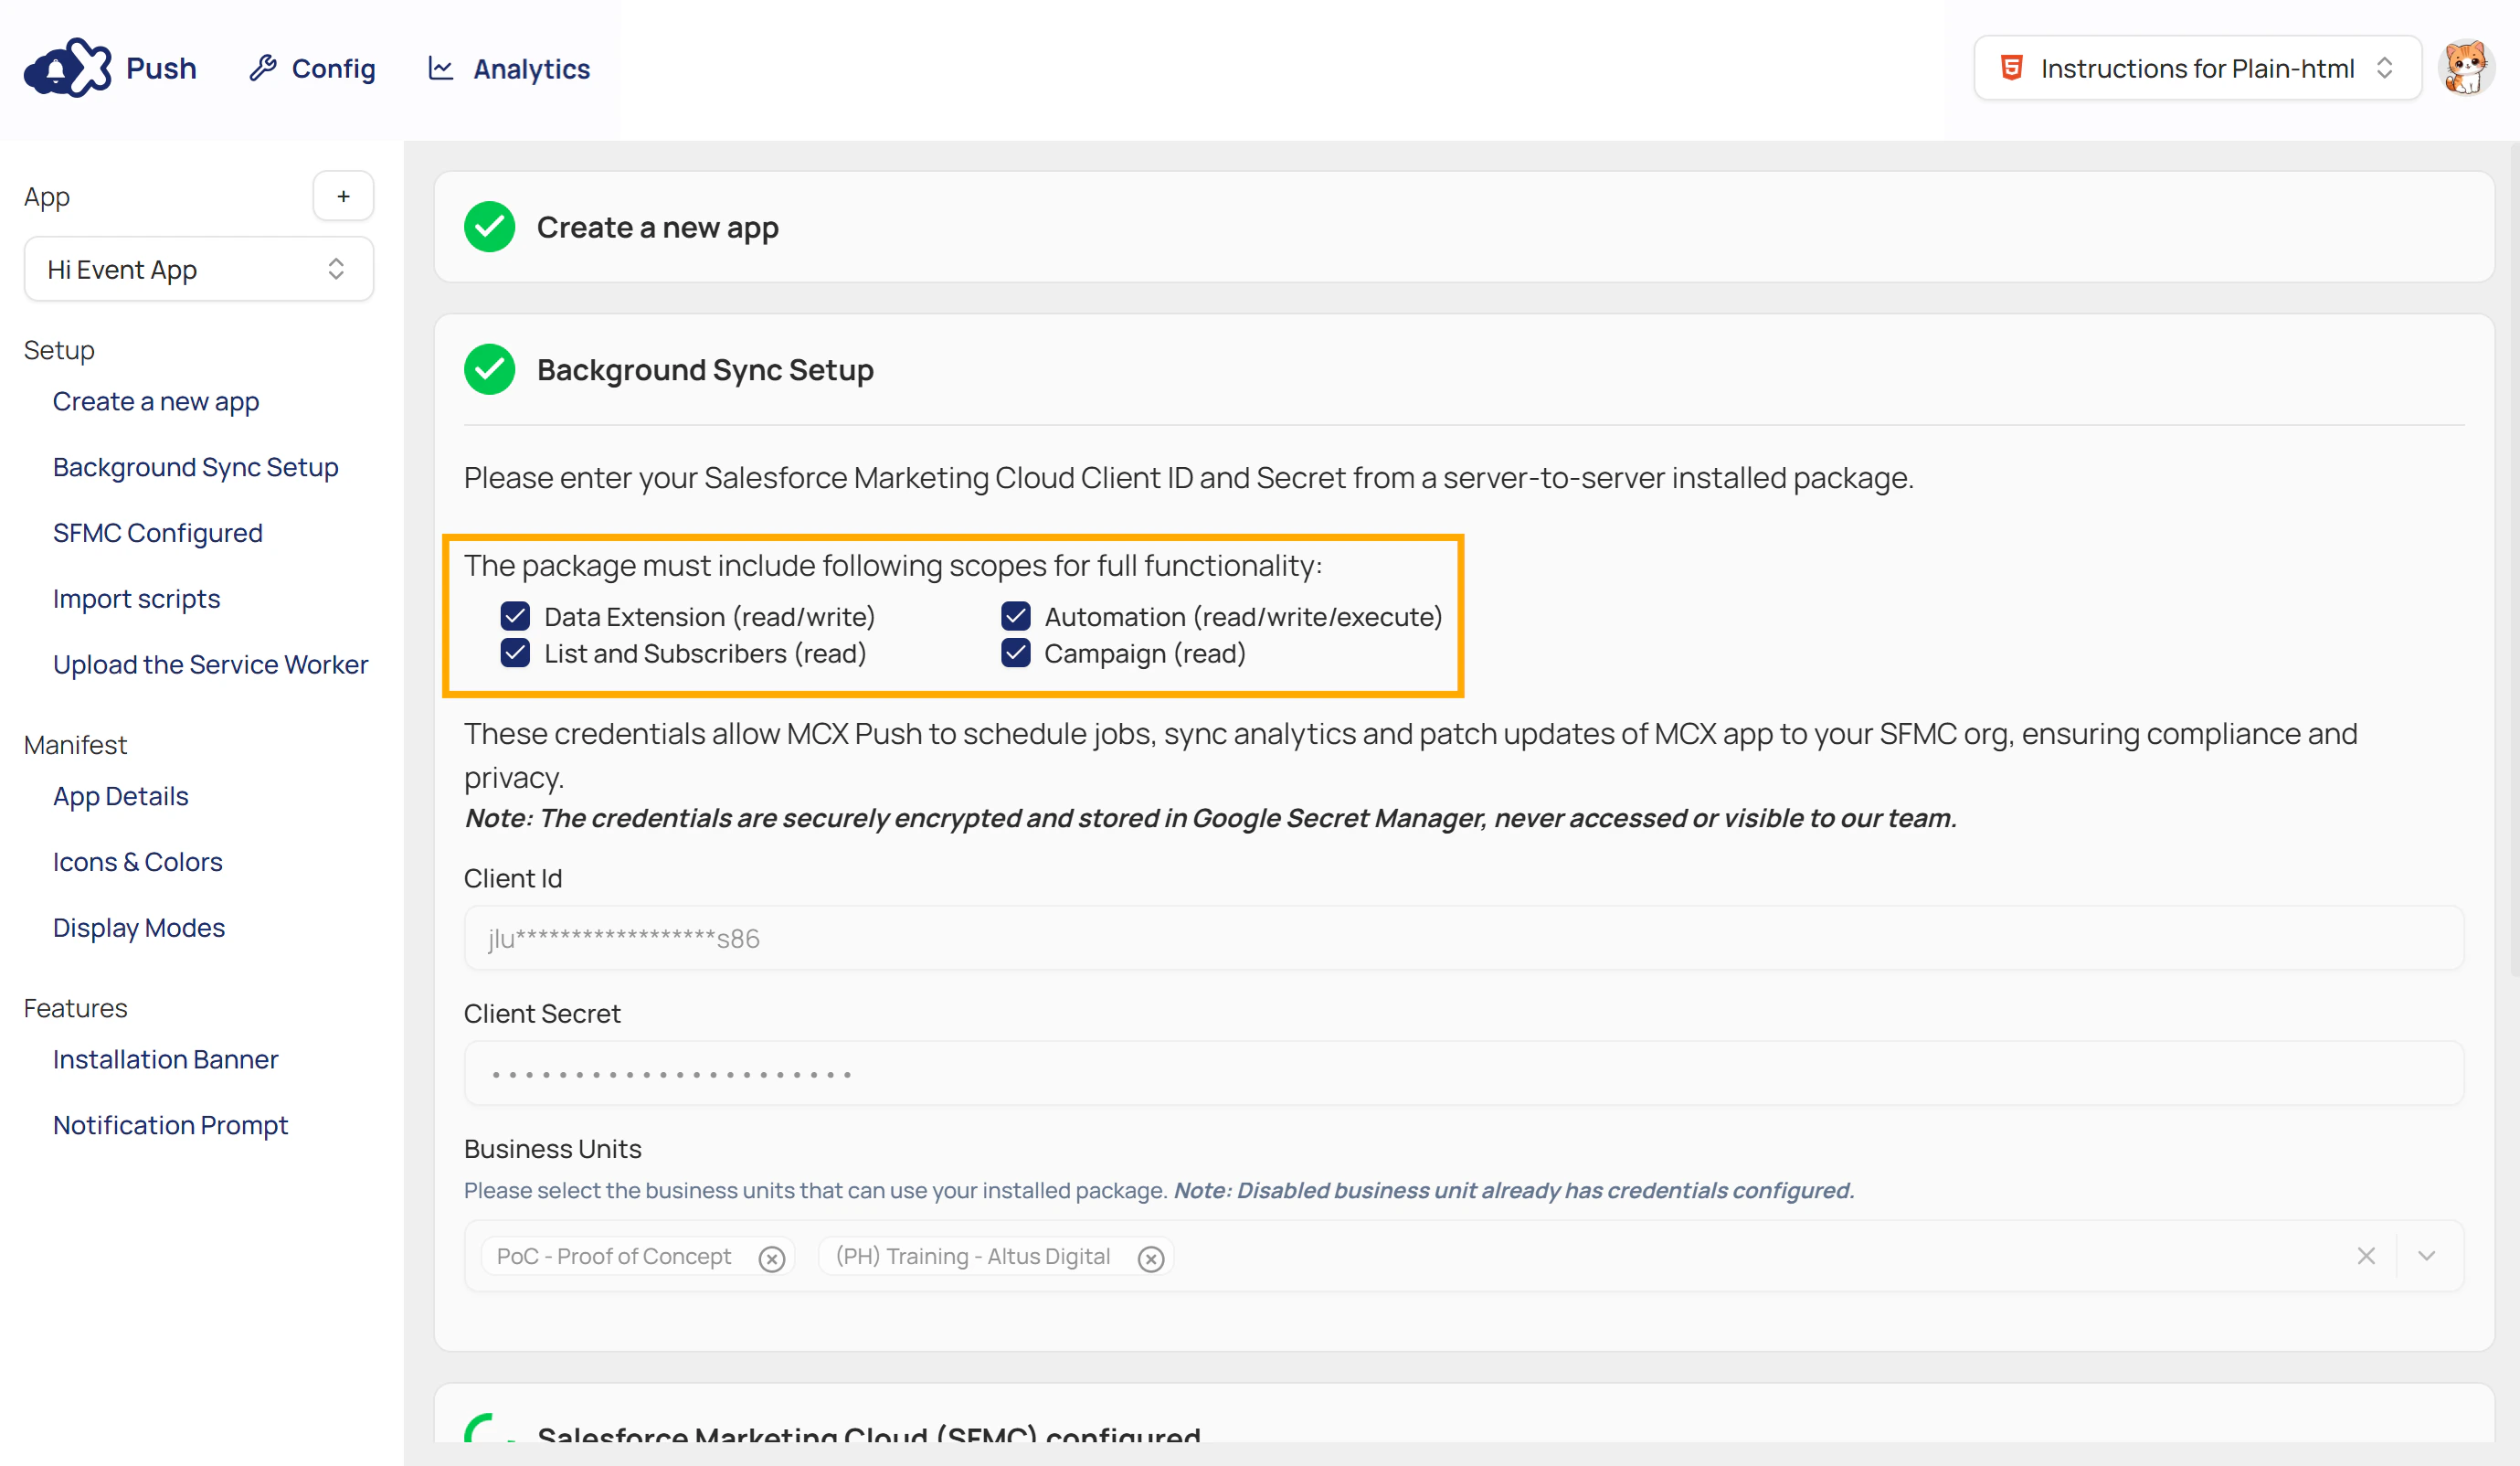
- Refer back to the dashboard to see the required scopes in the Background Sync Setup section, then assign them to the package.
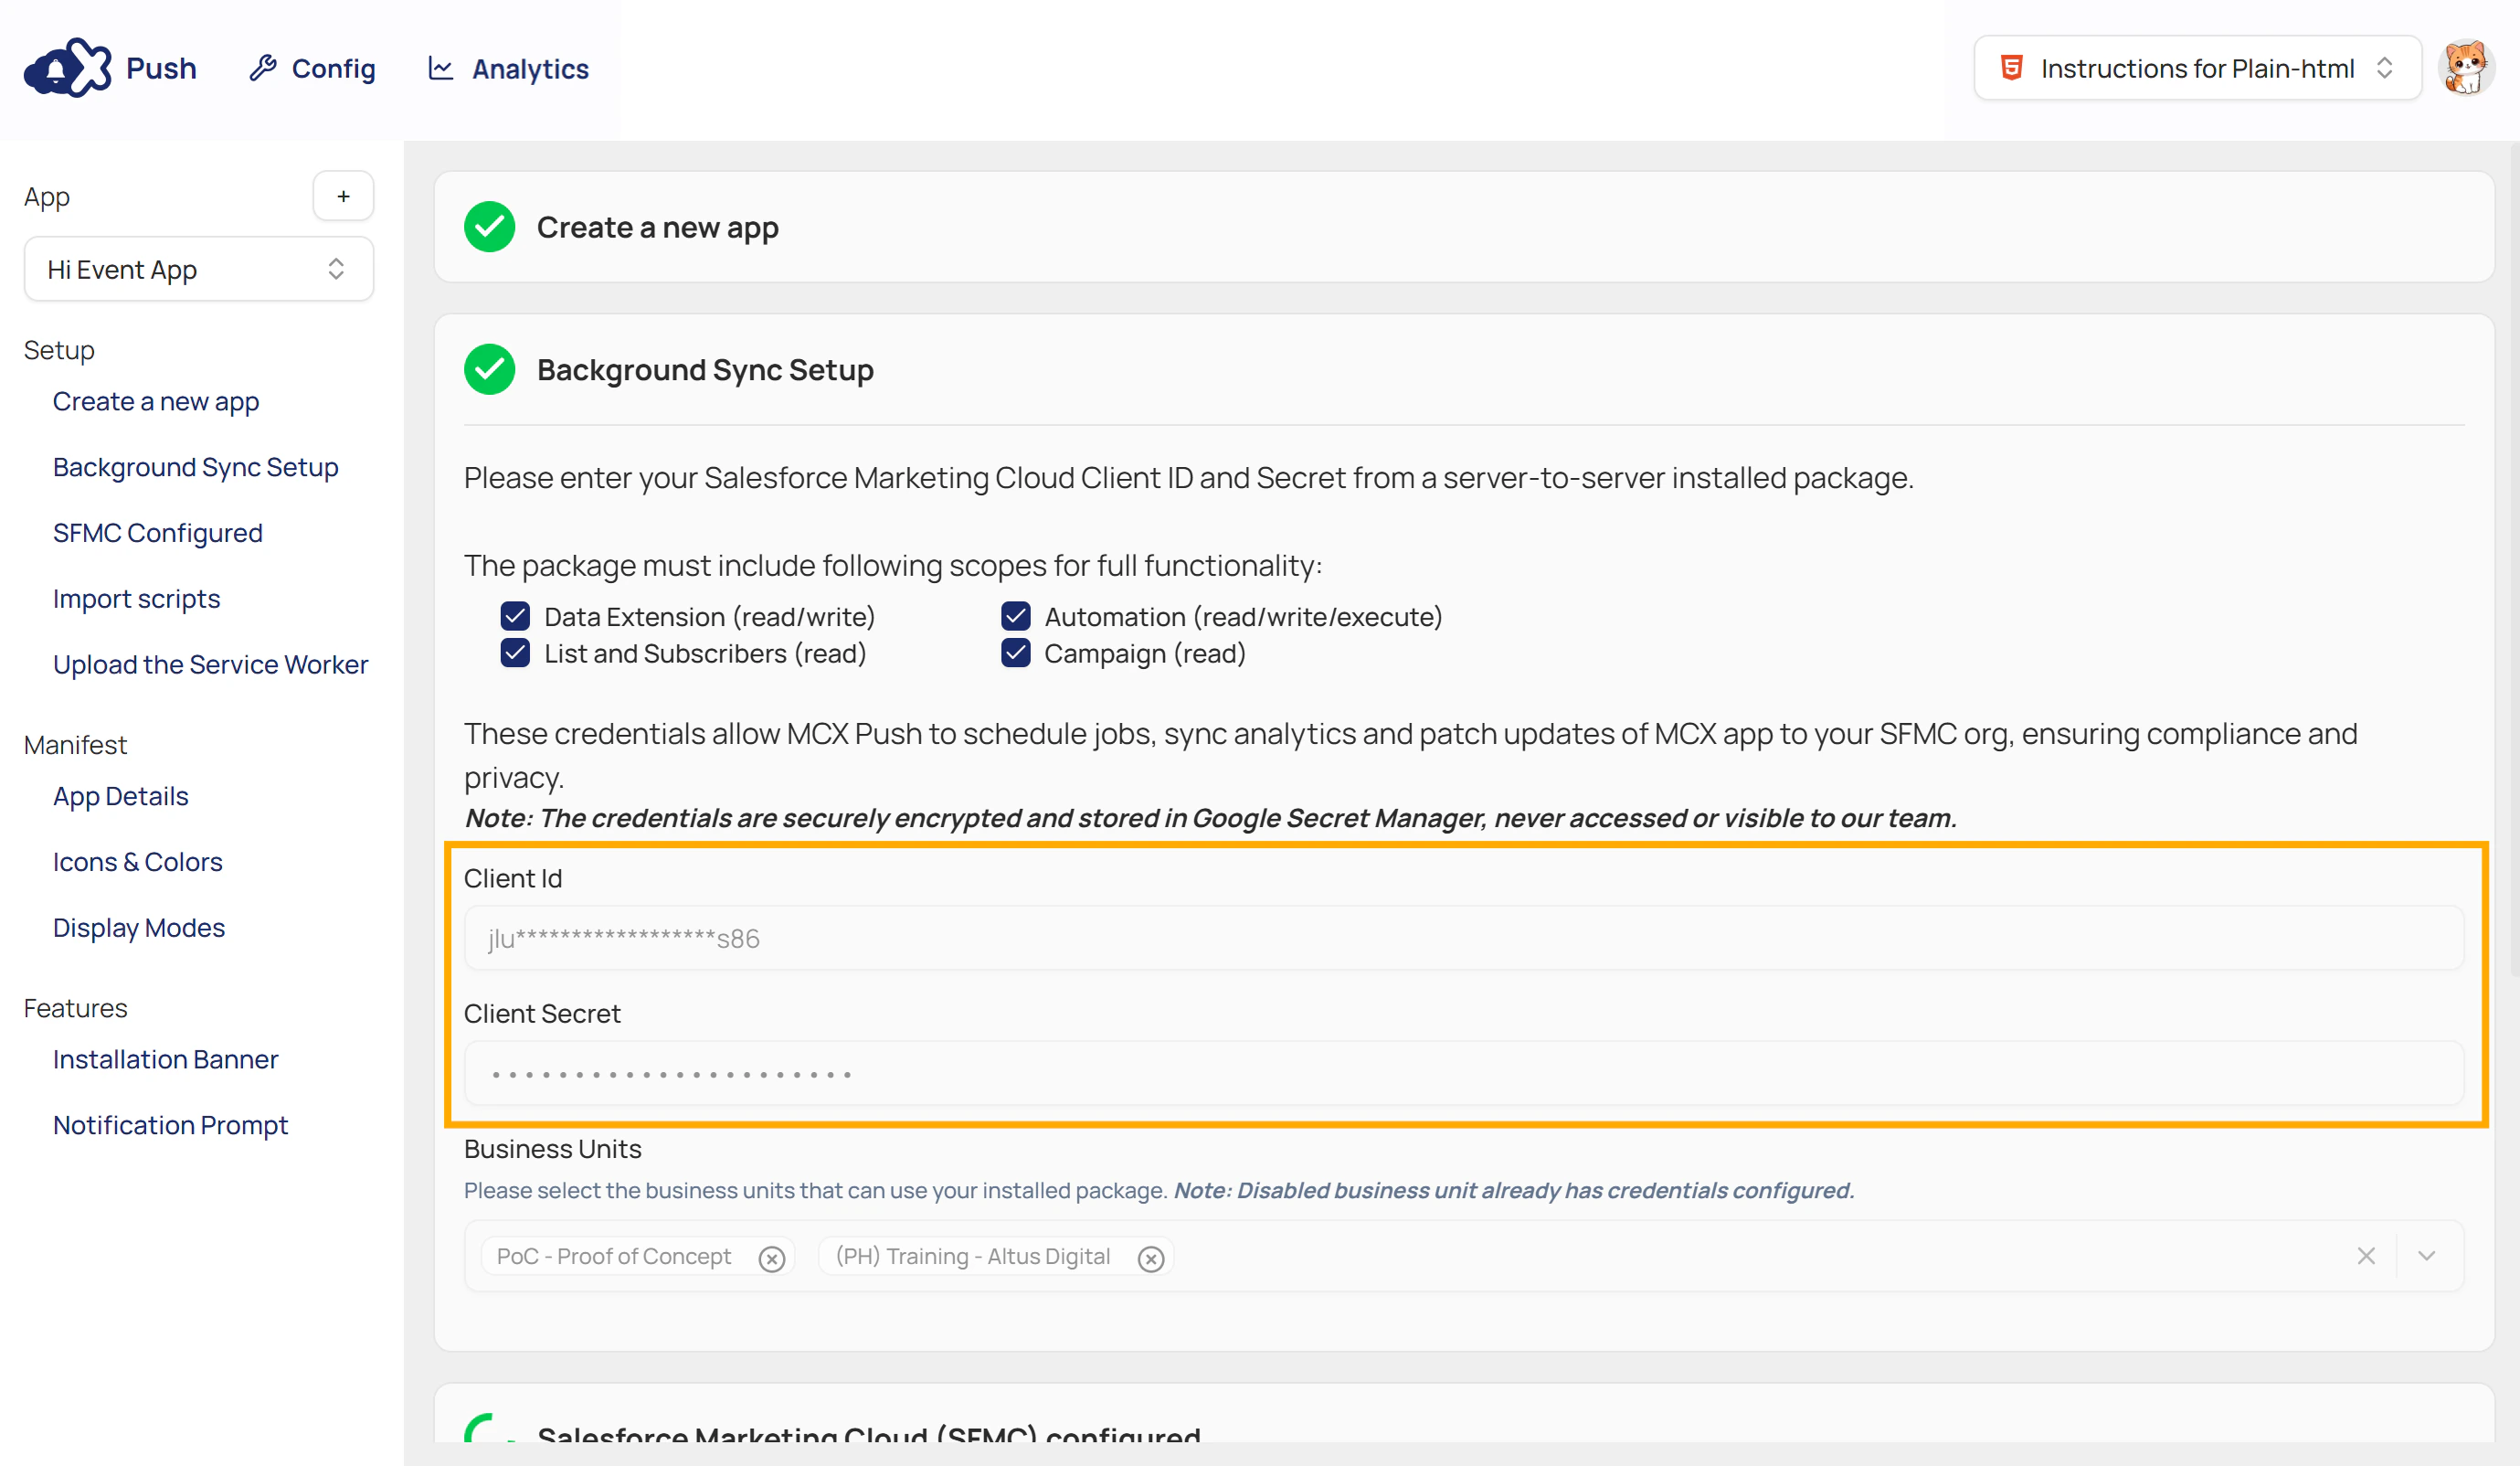
- After creating the package, locate the Client ID and Client Secret in the package details.
- Return to the dashboard and enter your Client ID and Client Secret into the provided fields.
- Click the Verify and save credentials button in the lower-left corner of this section. This will verify your credentials and generate the code snippets needed for the next steps.
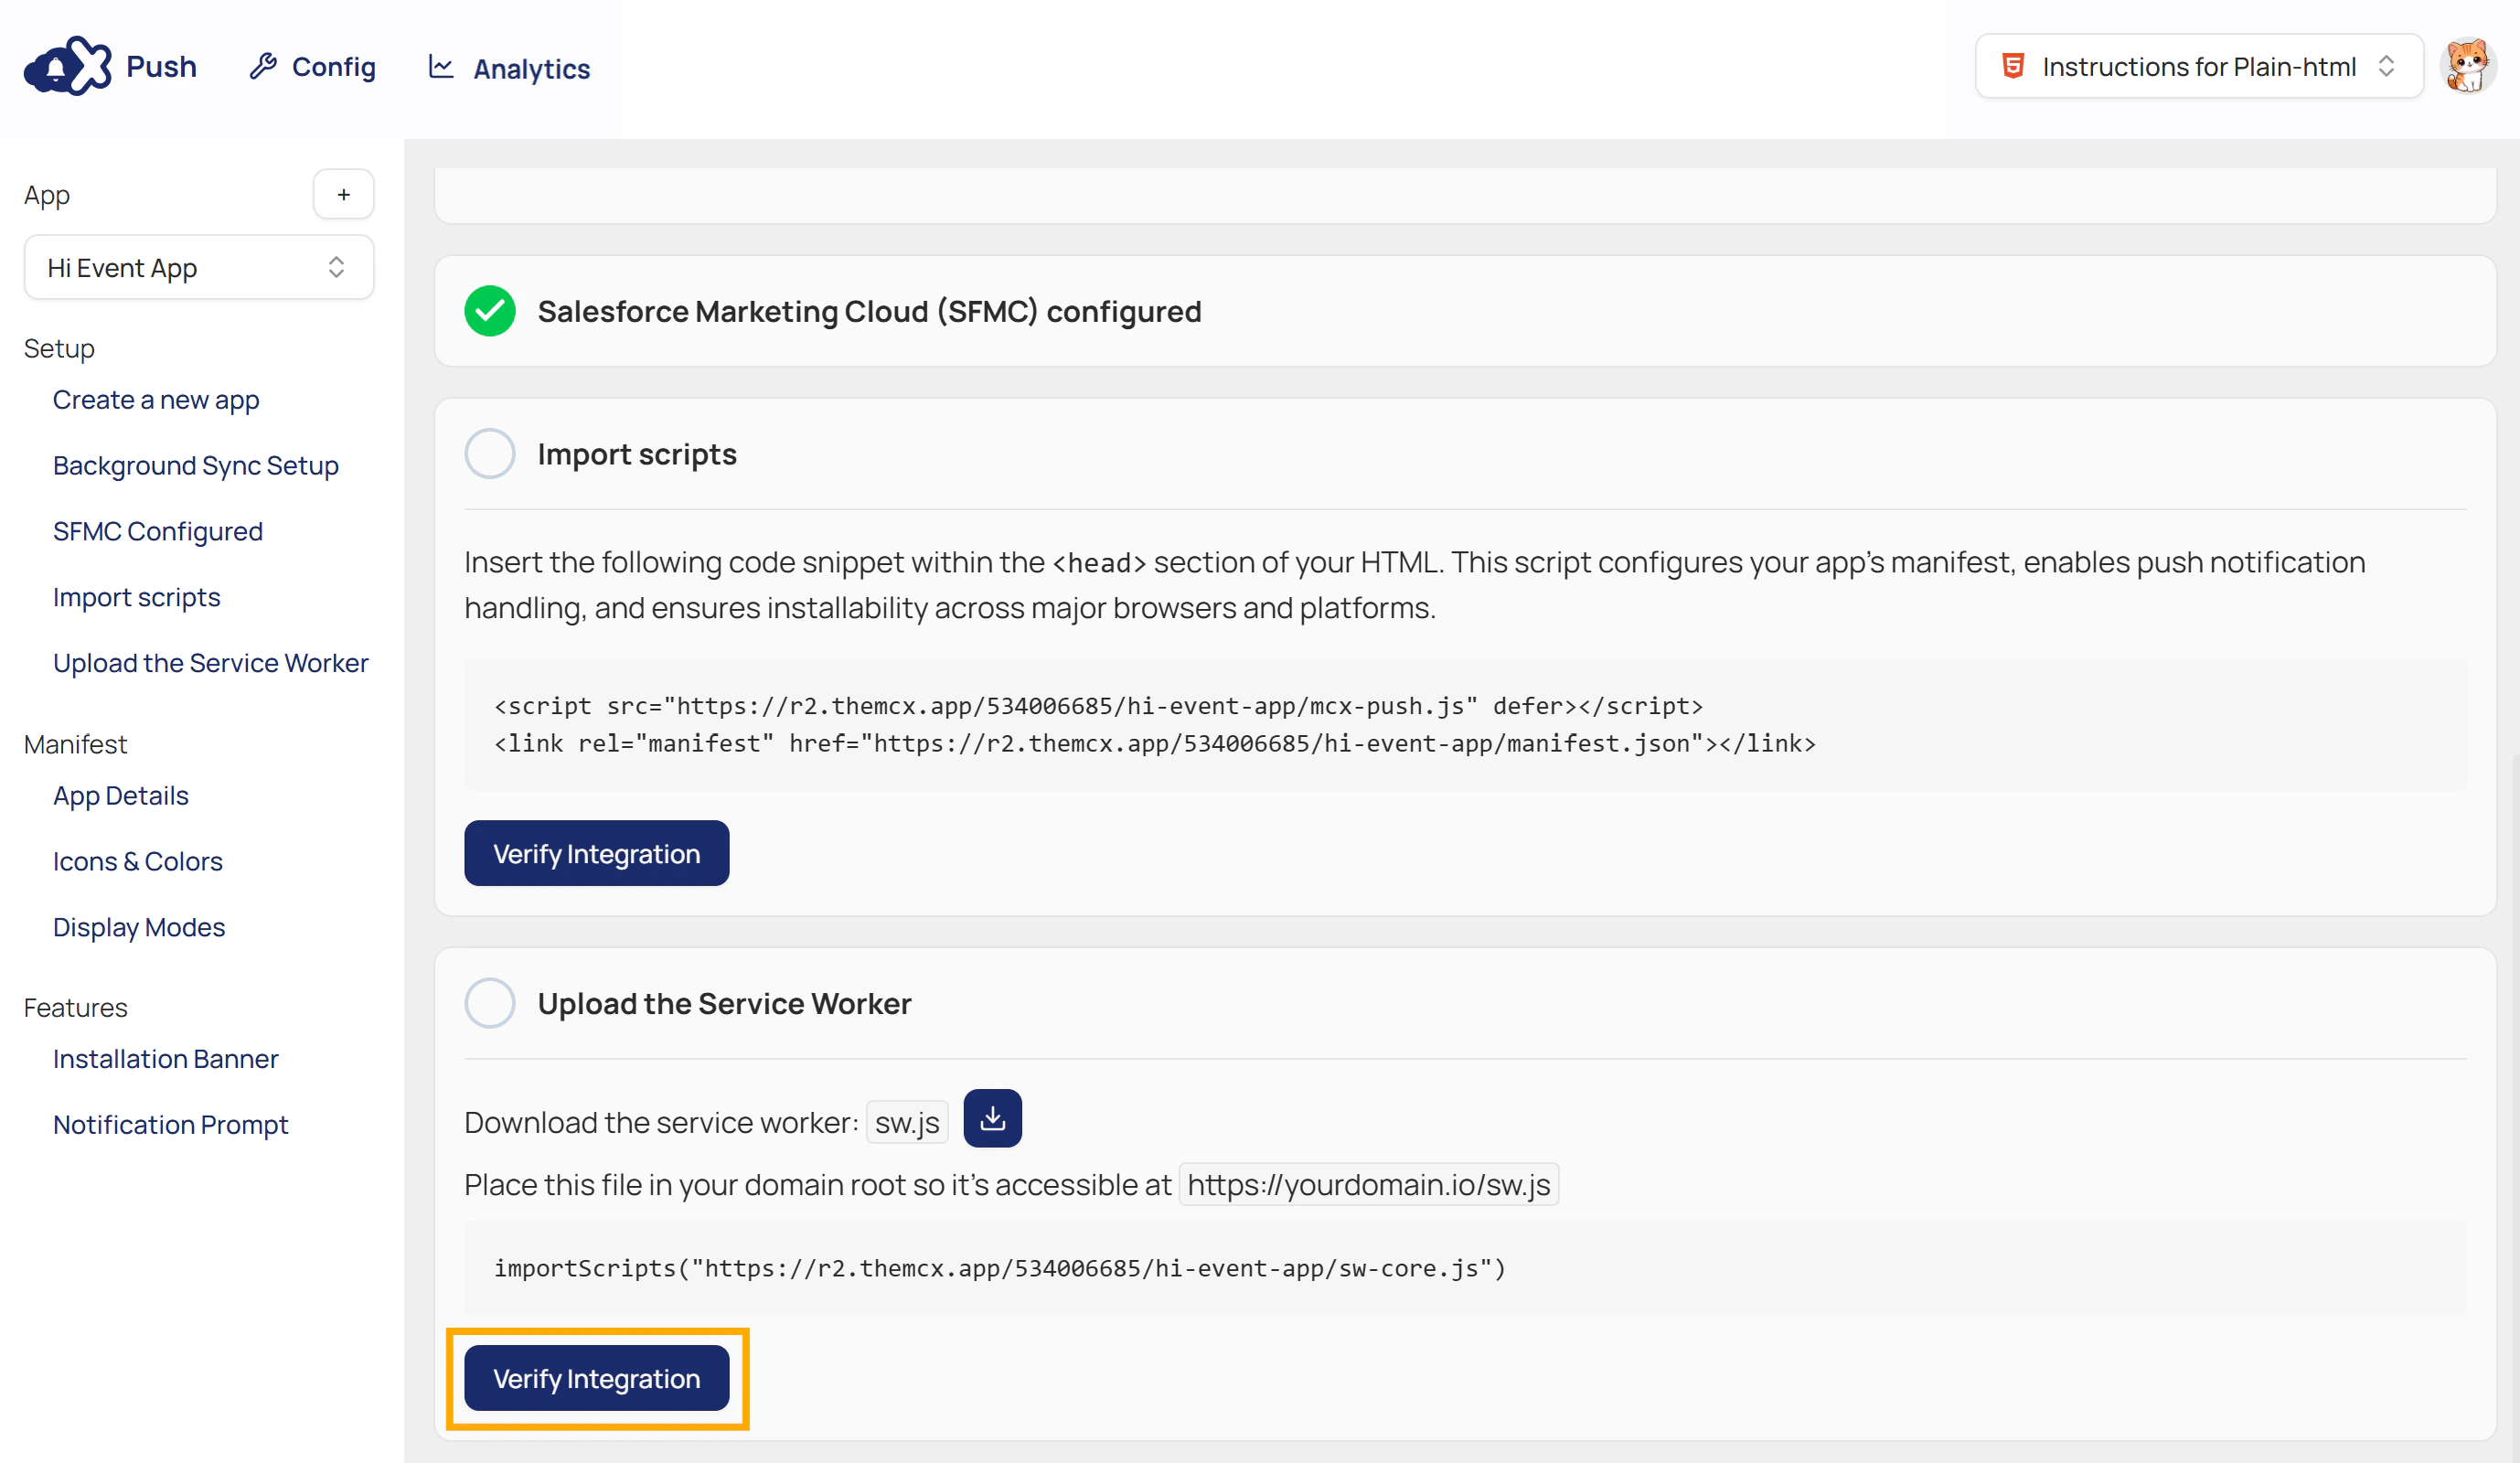
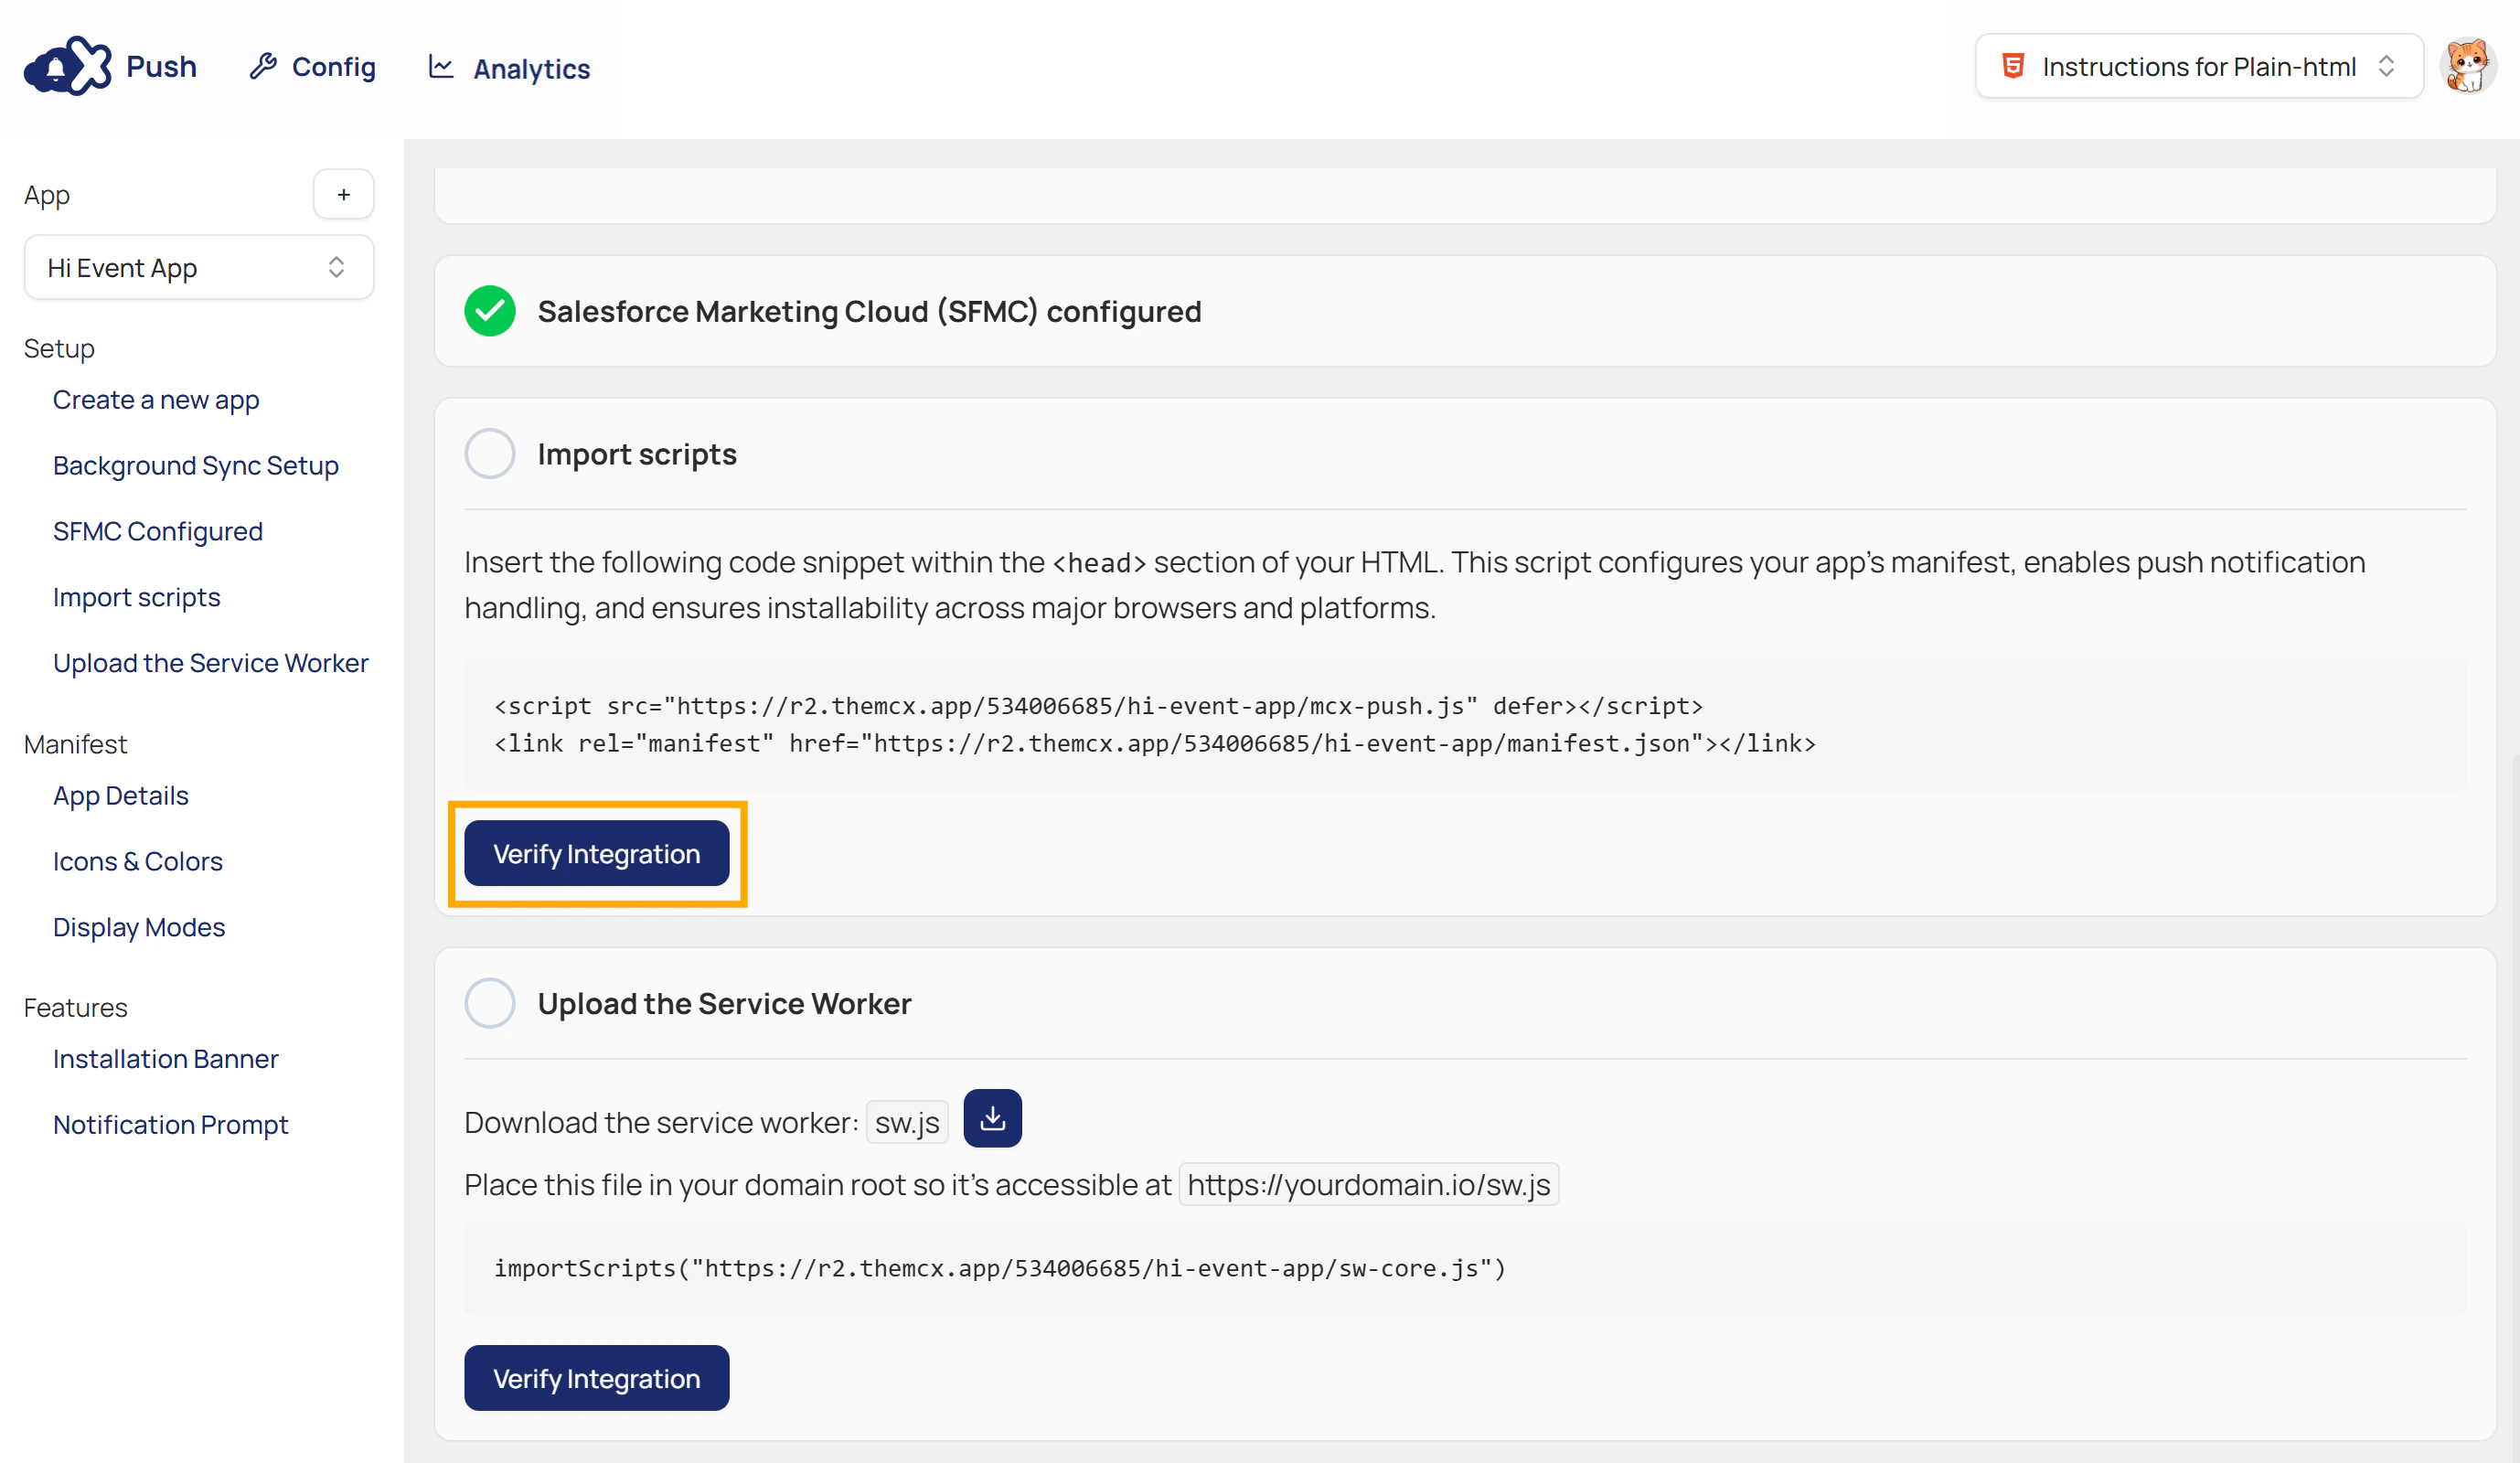
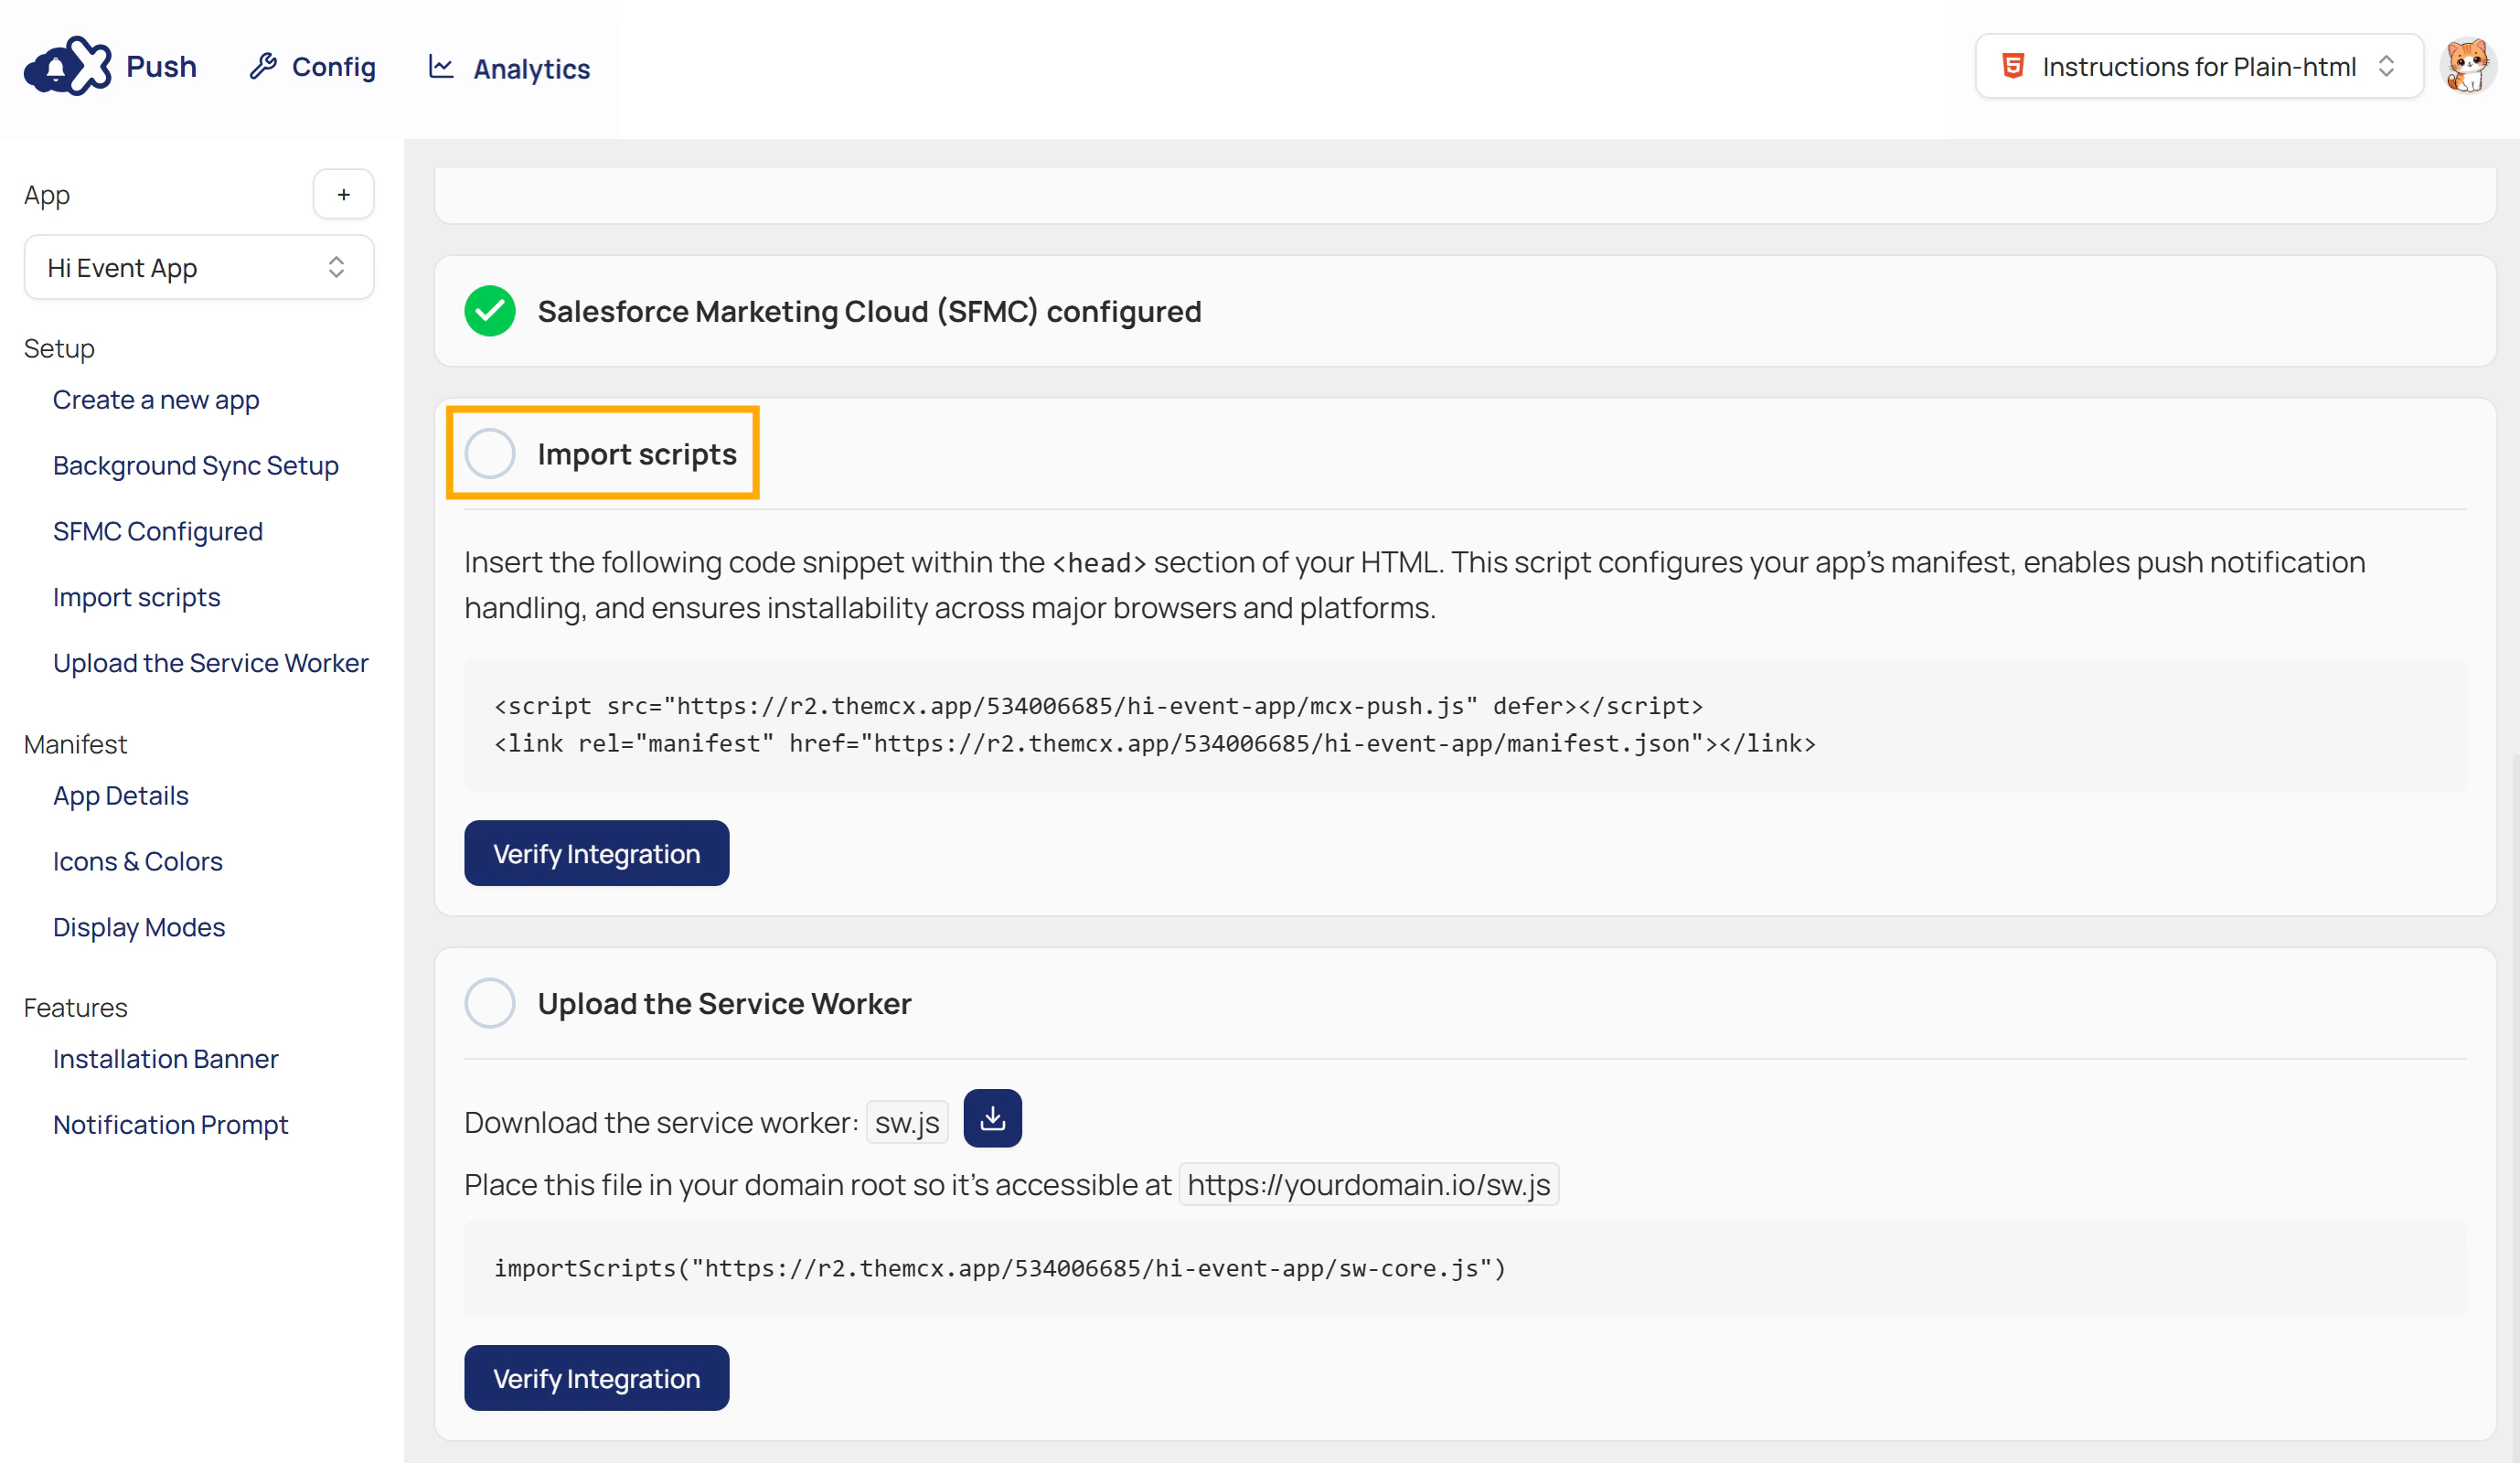
Step 4: Import Scripts
Before proceeding, ensure the correct framework is selected from the framework dropdown located in the upper-right corner of the dashboard. The instructions displayed in the Import Scripts section automatically update based on your selected framework (e.g., React, Vue, Angular, Next.js, or HTML).- In this section, copy the provided code snippet and follow the framework-specific steps shown in the dashboard.
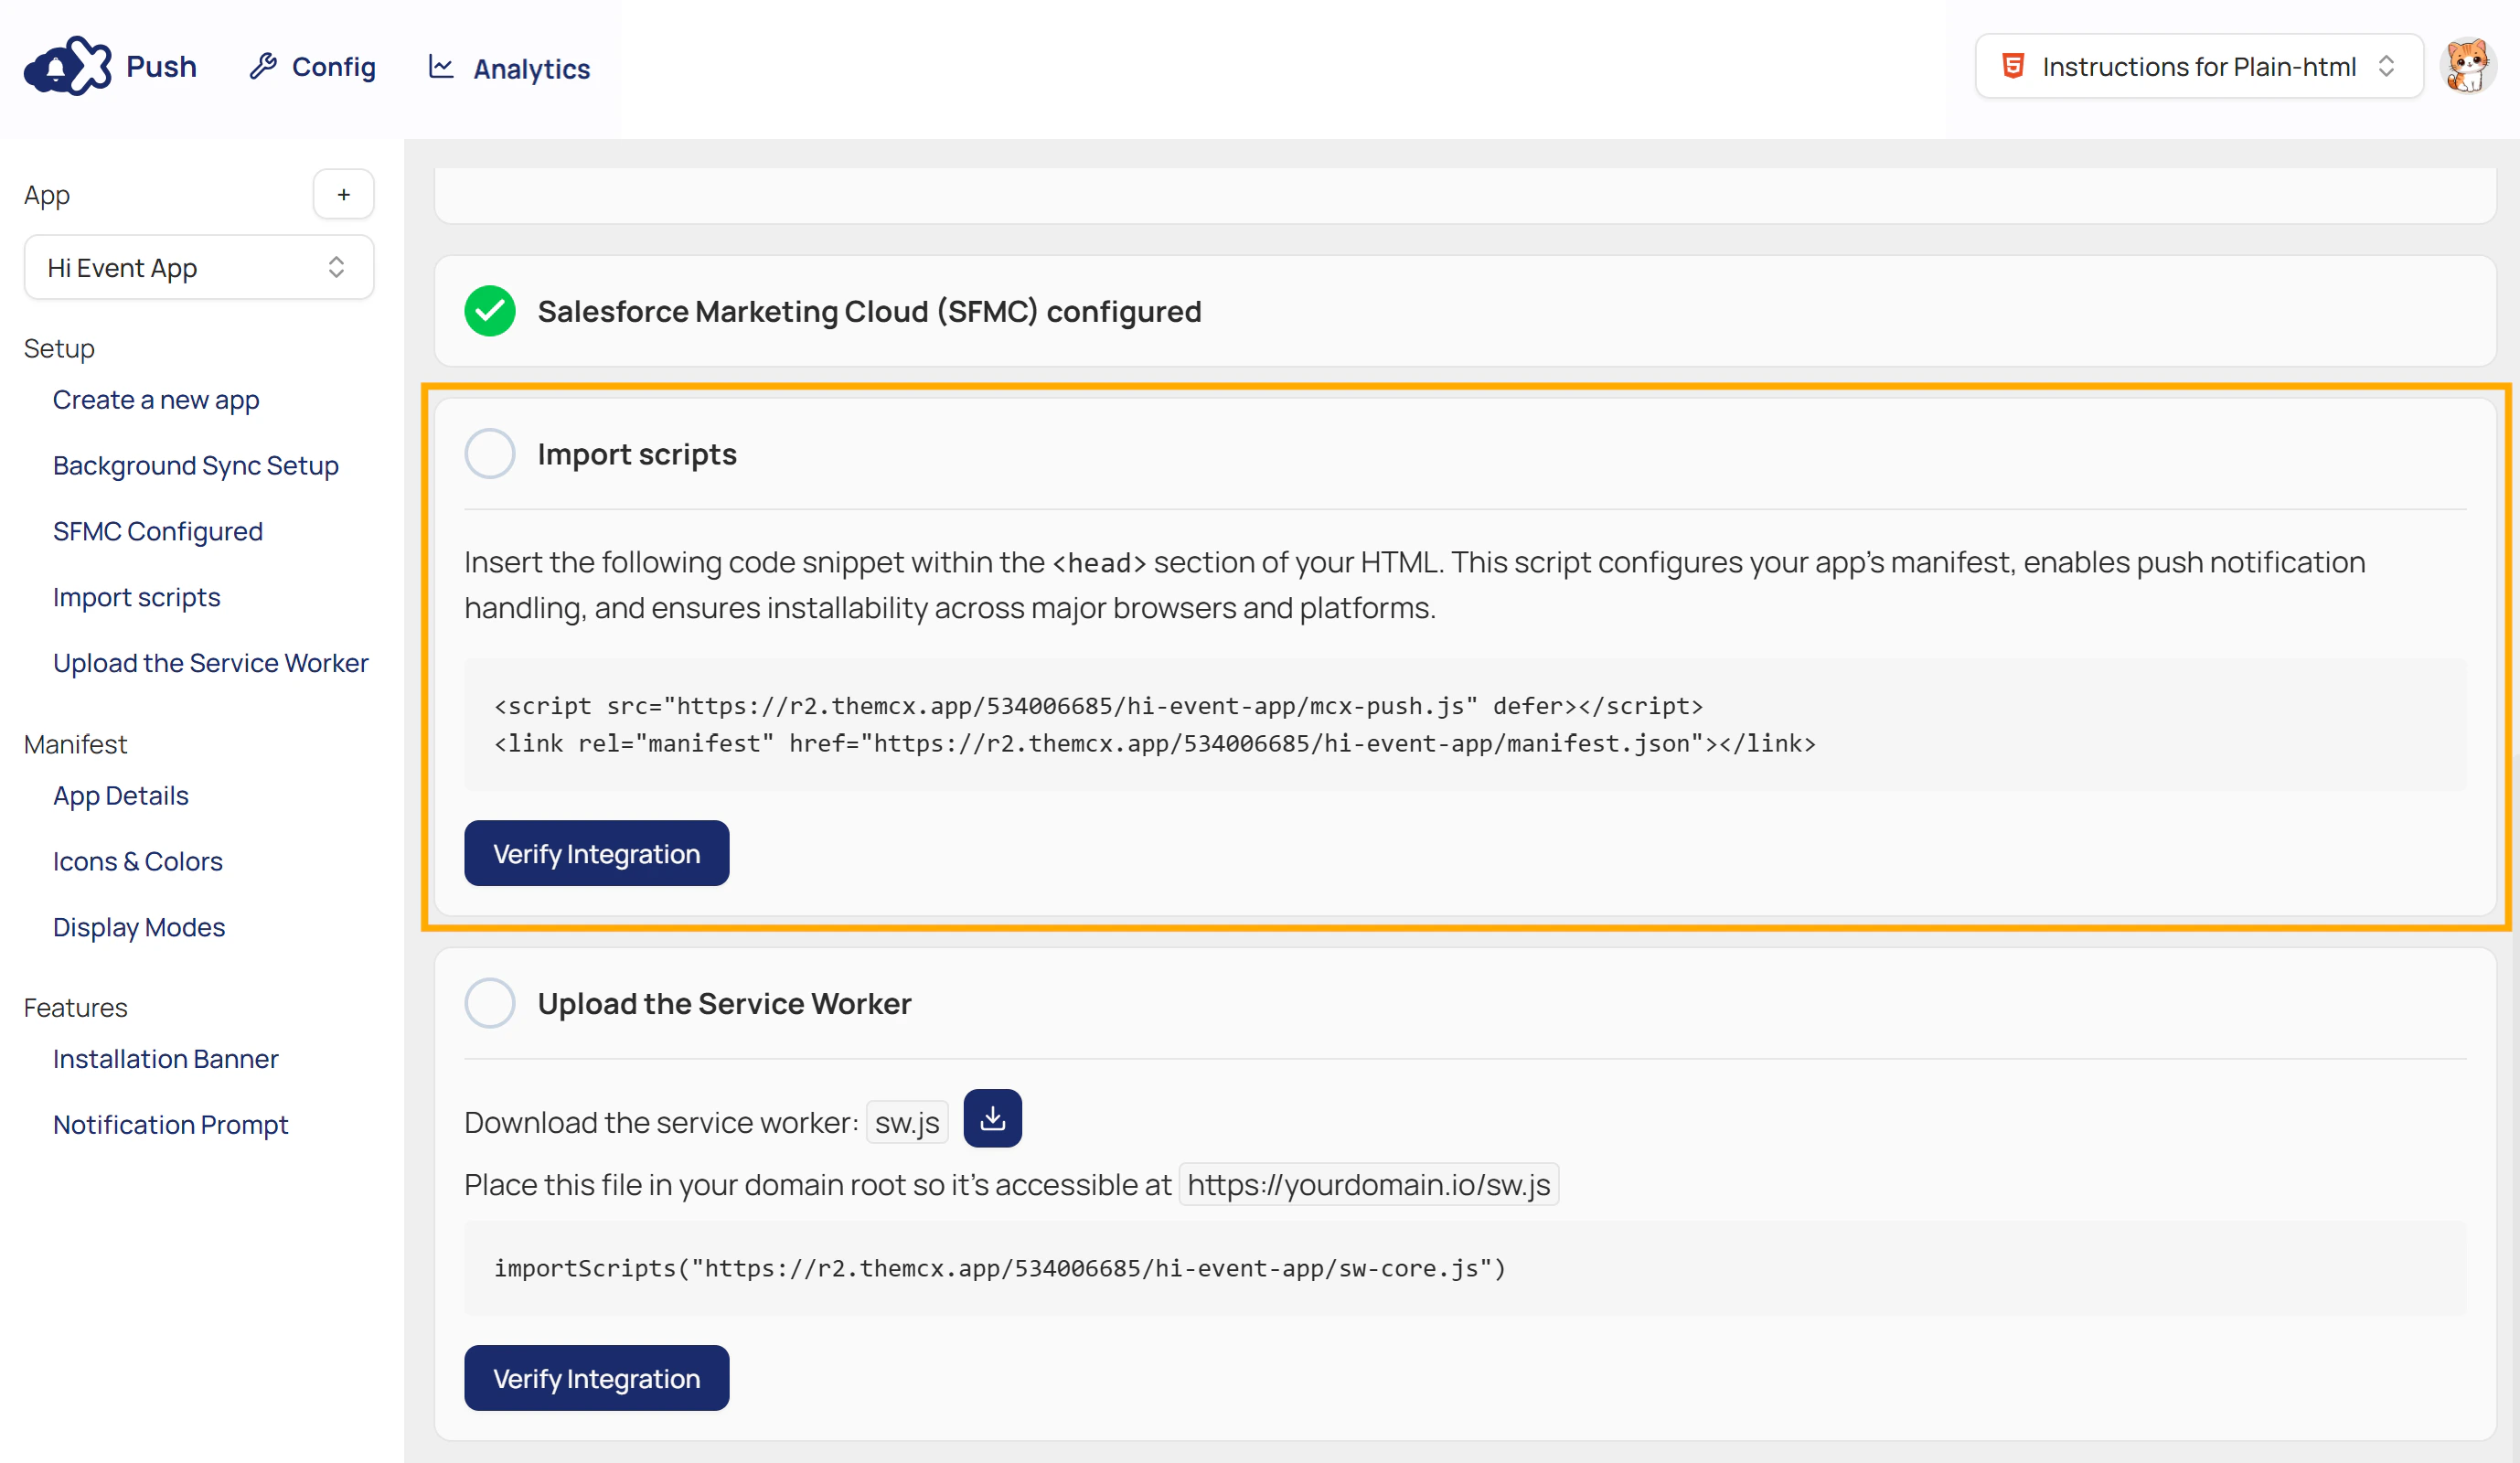
- Place the snippet inside the
<head>section of your HTML.
This script configures the app’s manifest, enables push notification handling, and ensures installability across major browsers and platforms.
- Click Verify Integration in the dashboard to confirm that your website has successfully loaded the MCX Push script and manifest. This step ensures the connection is working before you continue.
Step 5: Upload the Service Worker
Ensure the correct framework is selected from the framework dropdown in the upper-right corner of the dashboard.The instructions in the Upload the Service Worker section automatically update based on your selected framework.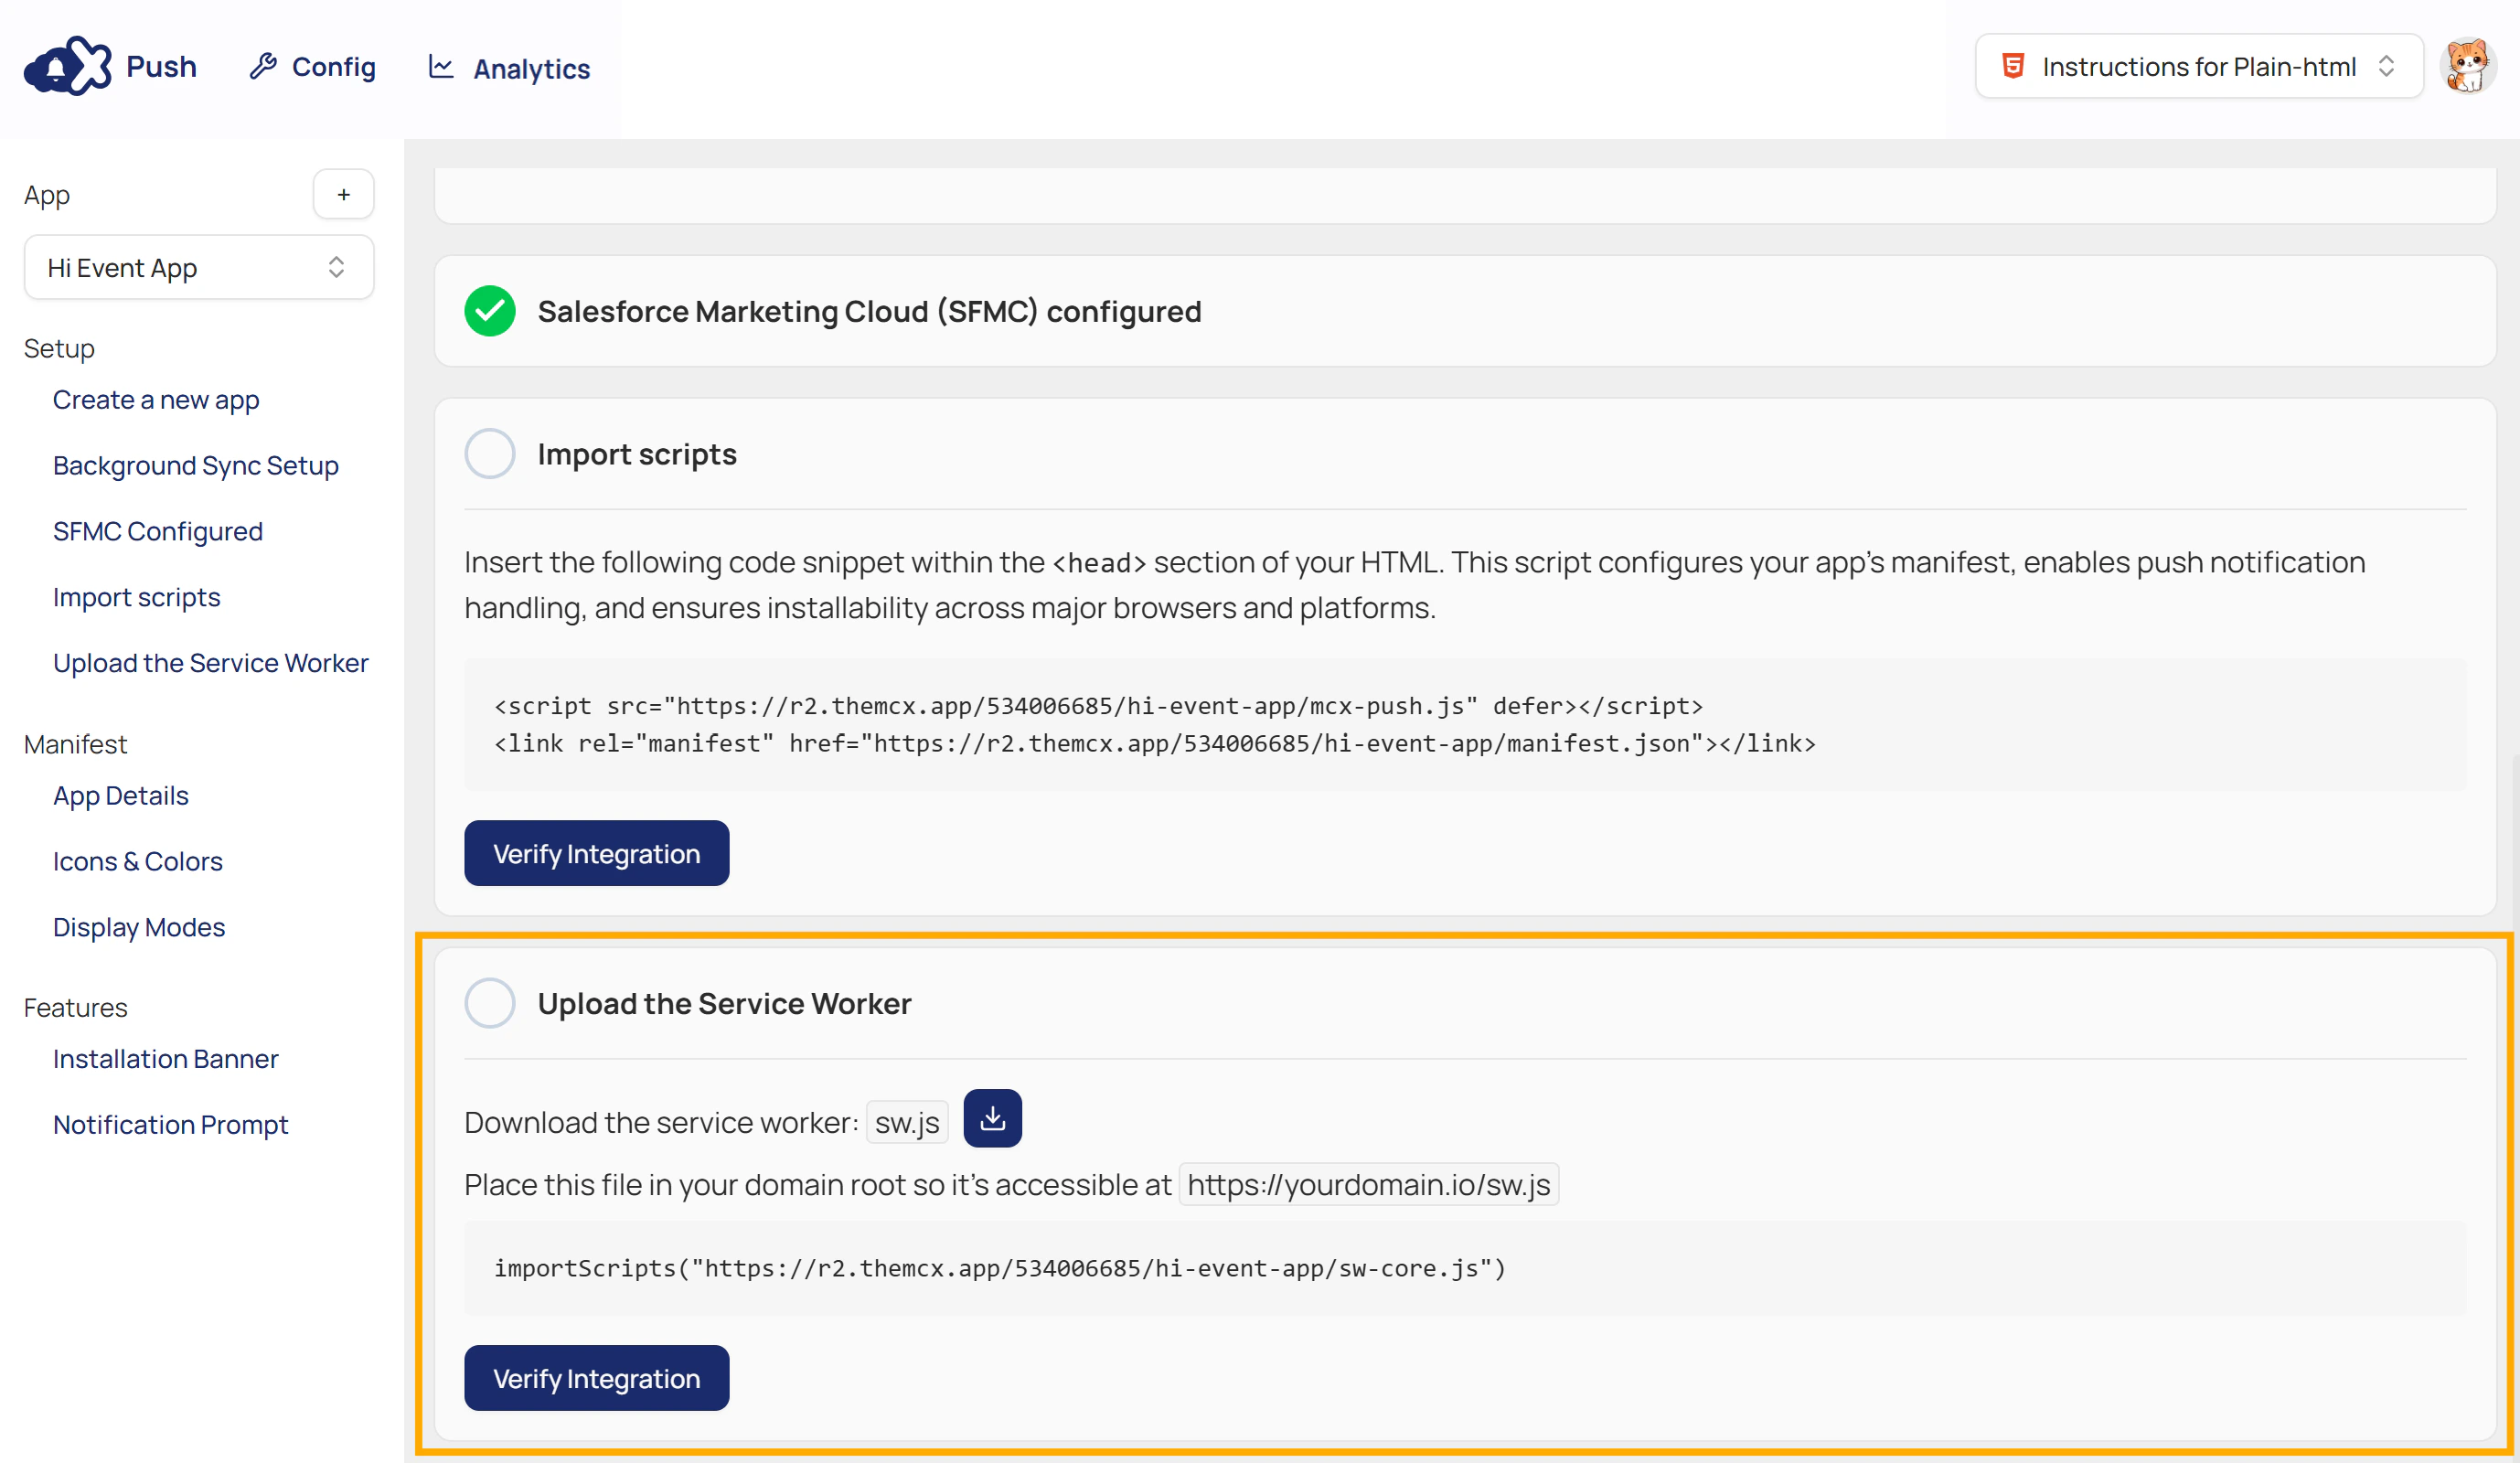
- In this section, download the file: sw.js.
- Follow the framework-specific steps displayed in the dashboard for the correct placement and configuration.
- Click Verify Integration in the dashboard to confirm that the is detected on your website.