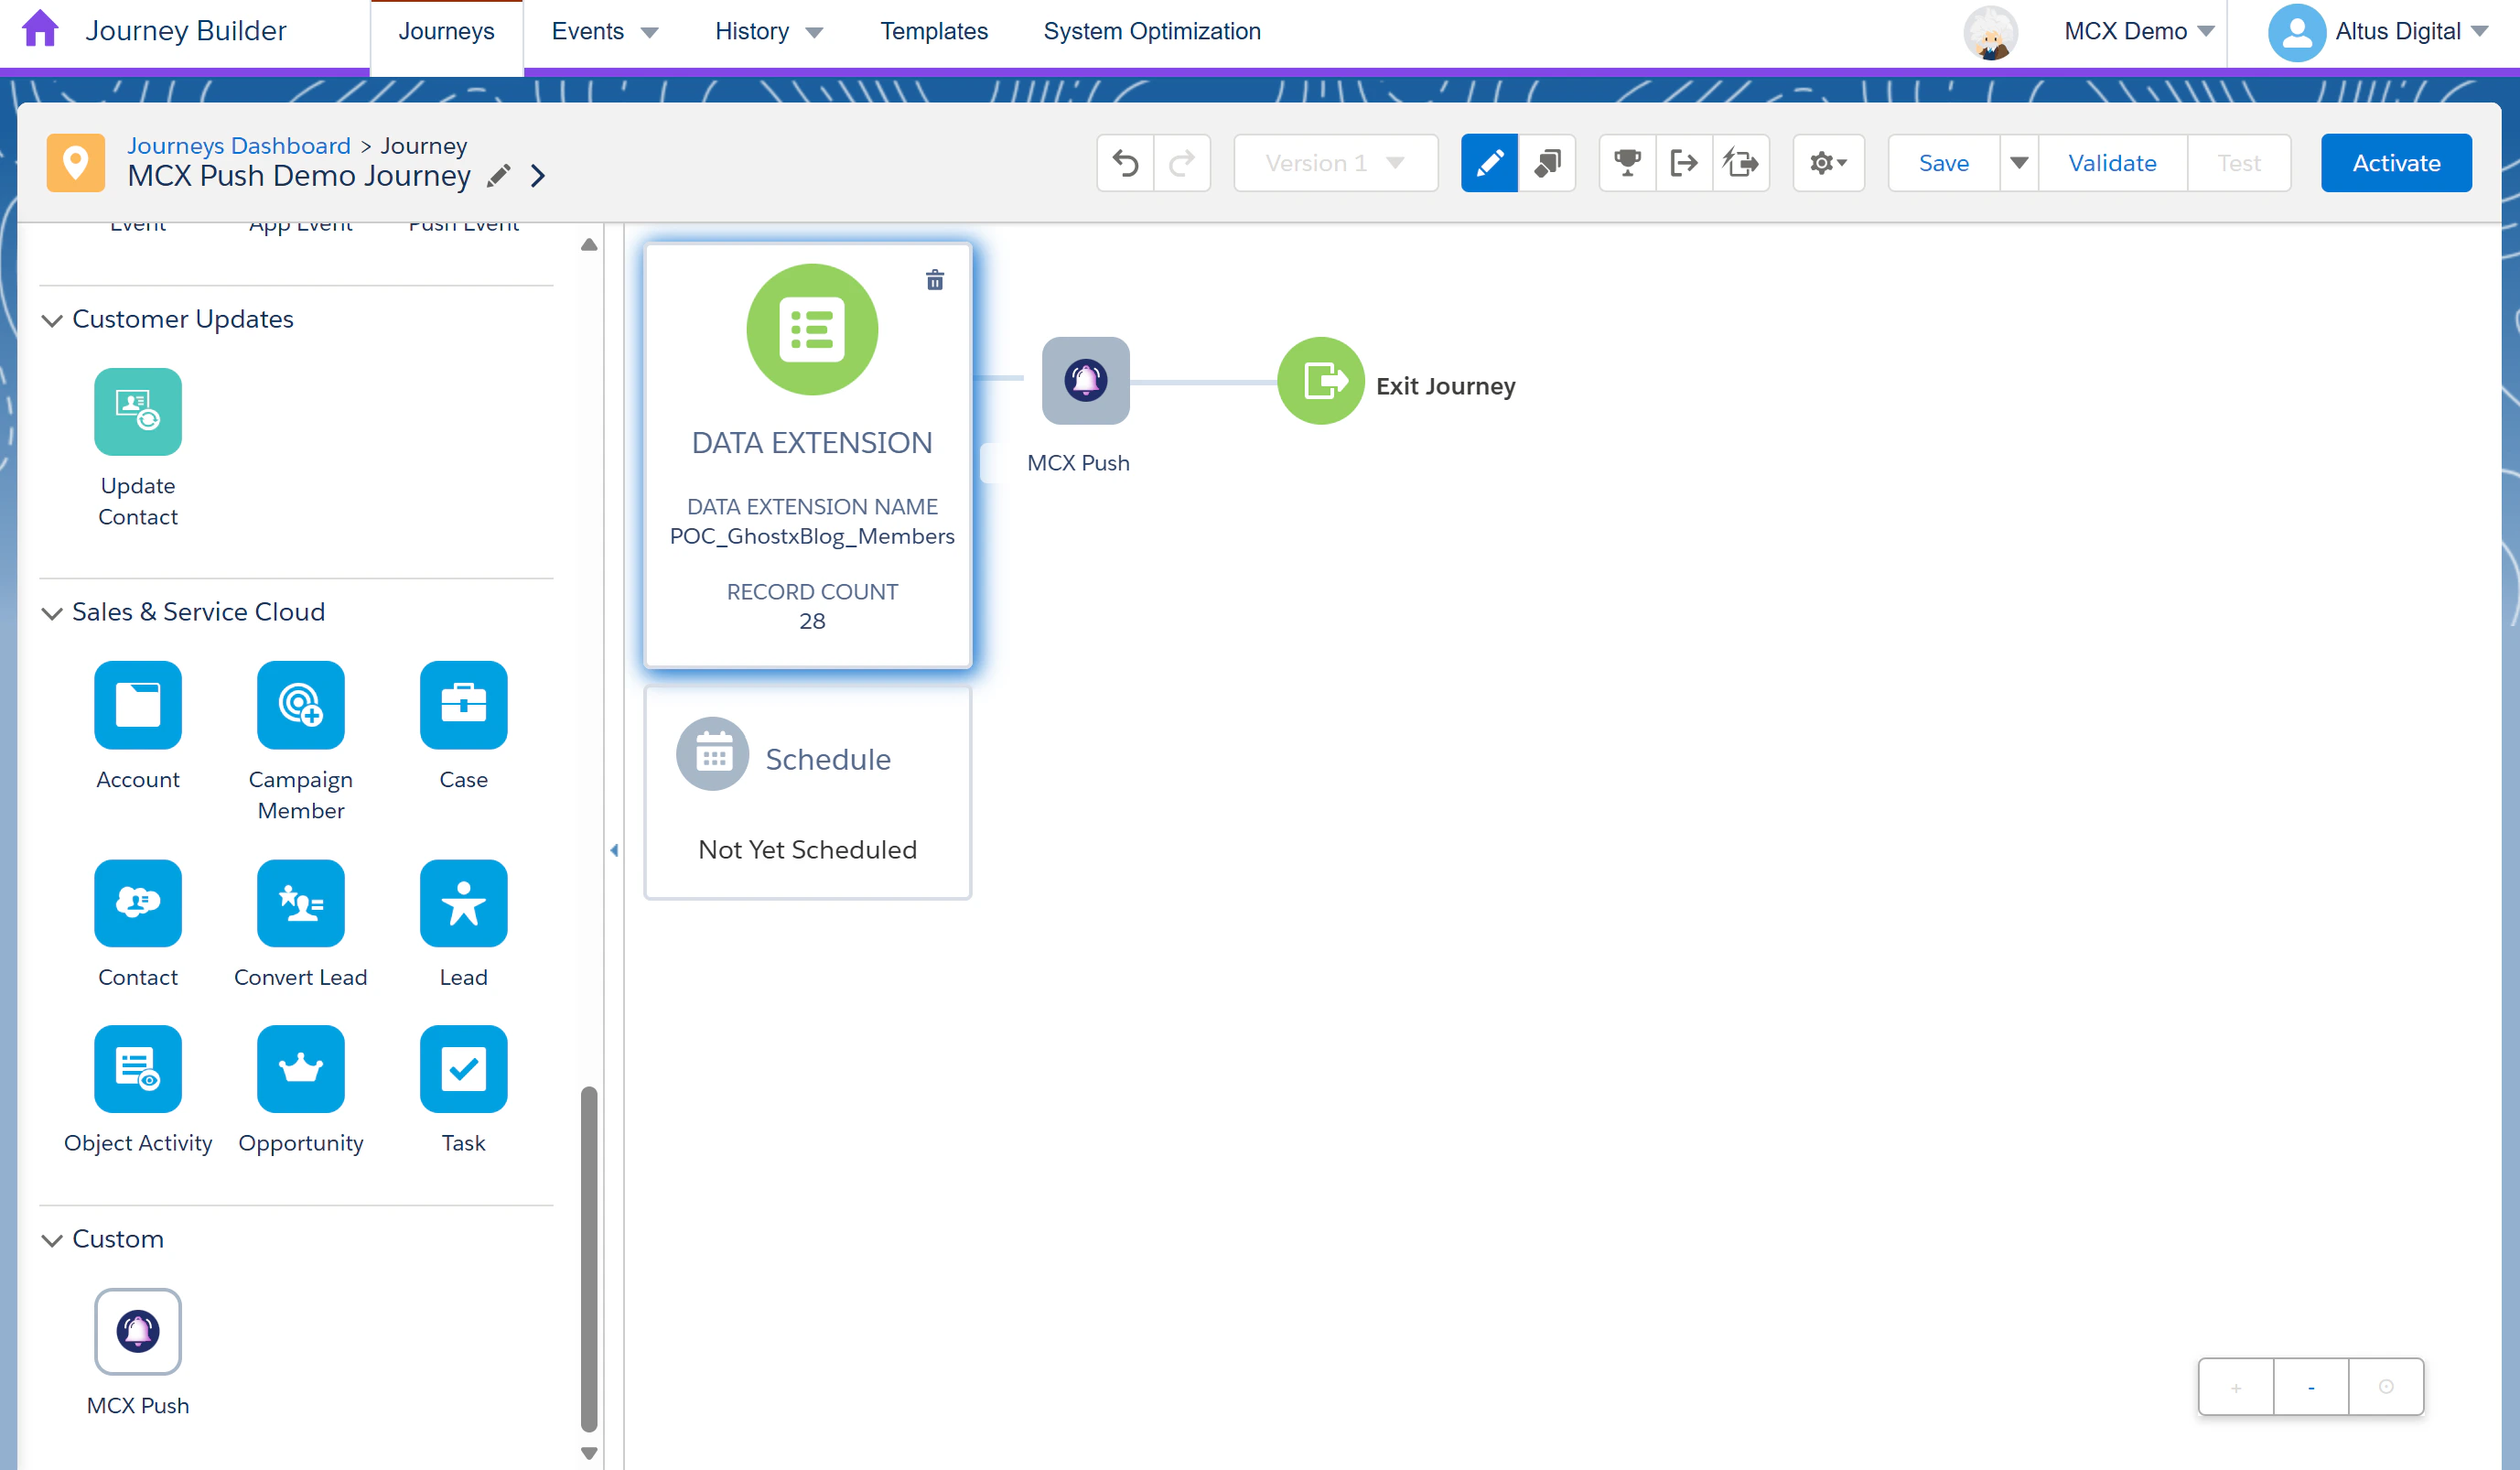
Step 1: Add the MCX Push Custom Activity
- Drag the MCX Push from the Activities panel onto the canvas to configure web push notifications as a step in your journey.
Step 2: Configure the MCX Push Activity
Click on the MCX Push in the journey to open its configuration window. You’ll see two tabs to guide you through the setup: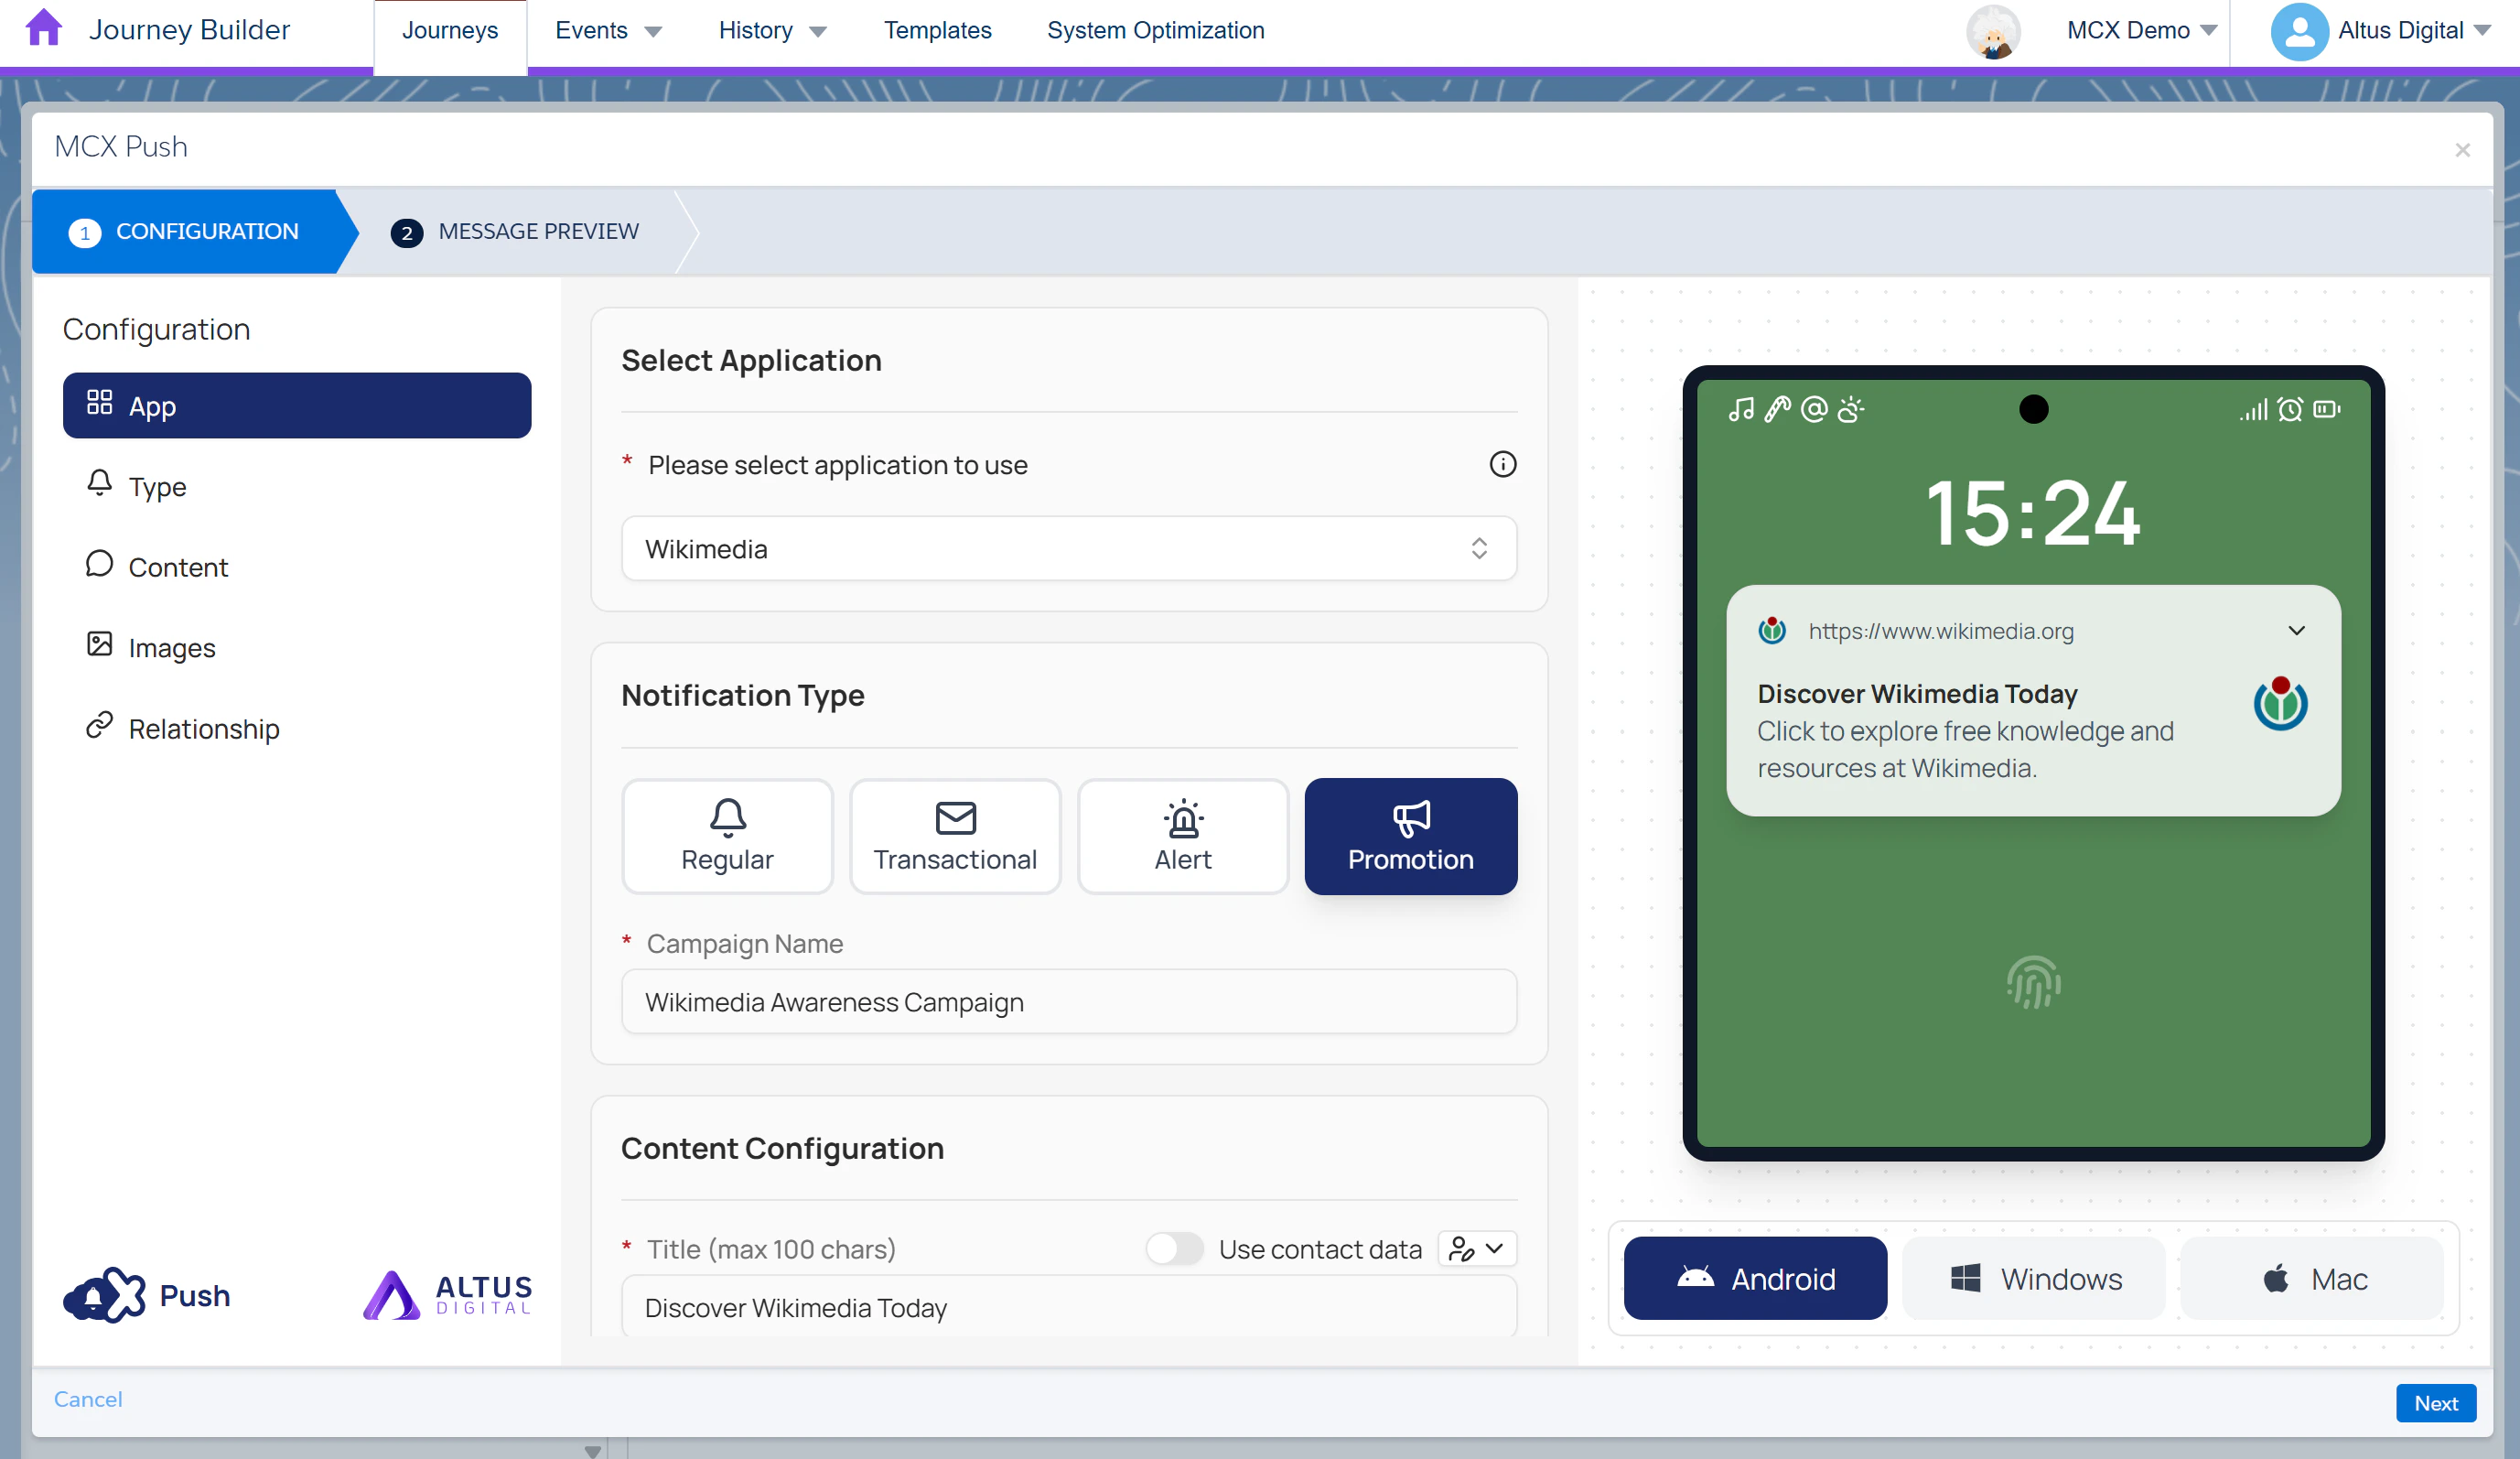
Configuration
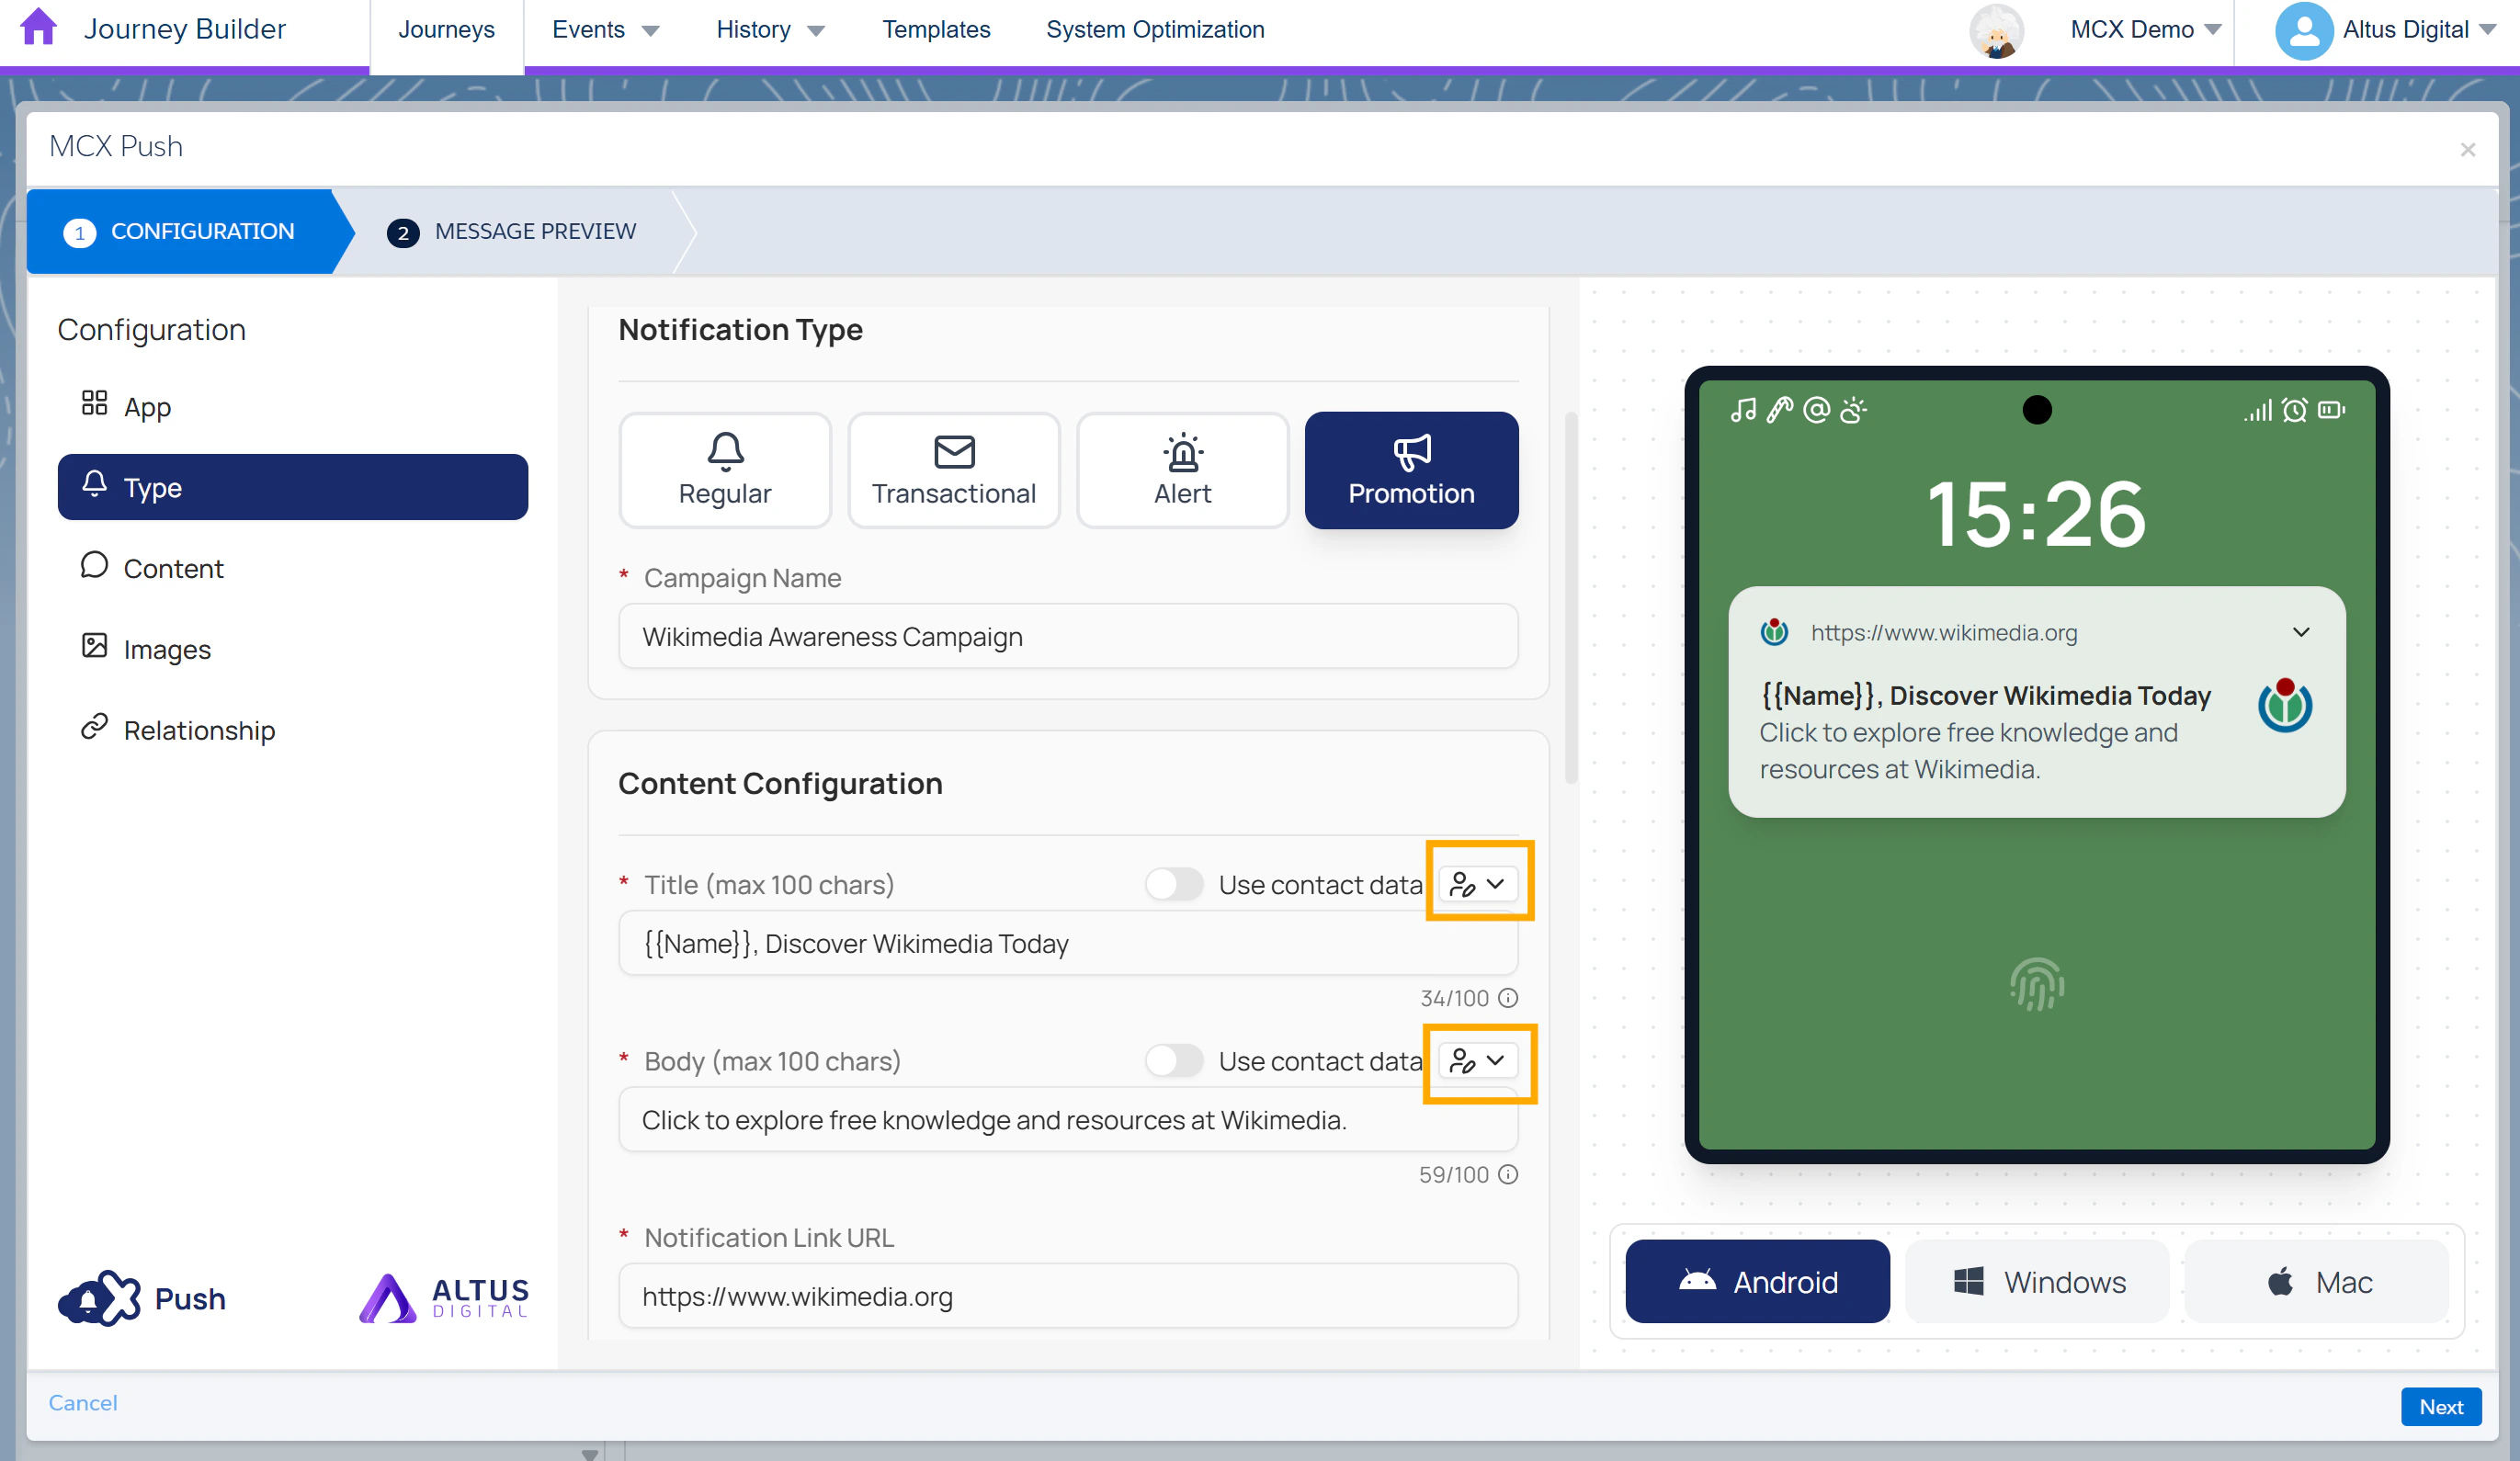
- Complete the following within the Configuration tab:
| Configuration Type | Field | Description |
|---|---|---|
| App | Select Application | The app you created in the dashboard that represents the website your subscribers opted in to receive push notifications. |
| Type | Notification Type | The type of notification you want to send: - Regular - Transactional - Alert - Promotion |
| Type | Campaign Name | A name to identify this push notification campaign. |
| Content | Title | Title text displayed on the notification (maximum 100 characters). |
| Content | Body | Main message content of the notification (maximum 100 characters). |
| Content | Notification Link URL | URL the user is directed to when clicking the notification. |
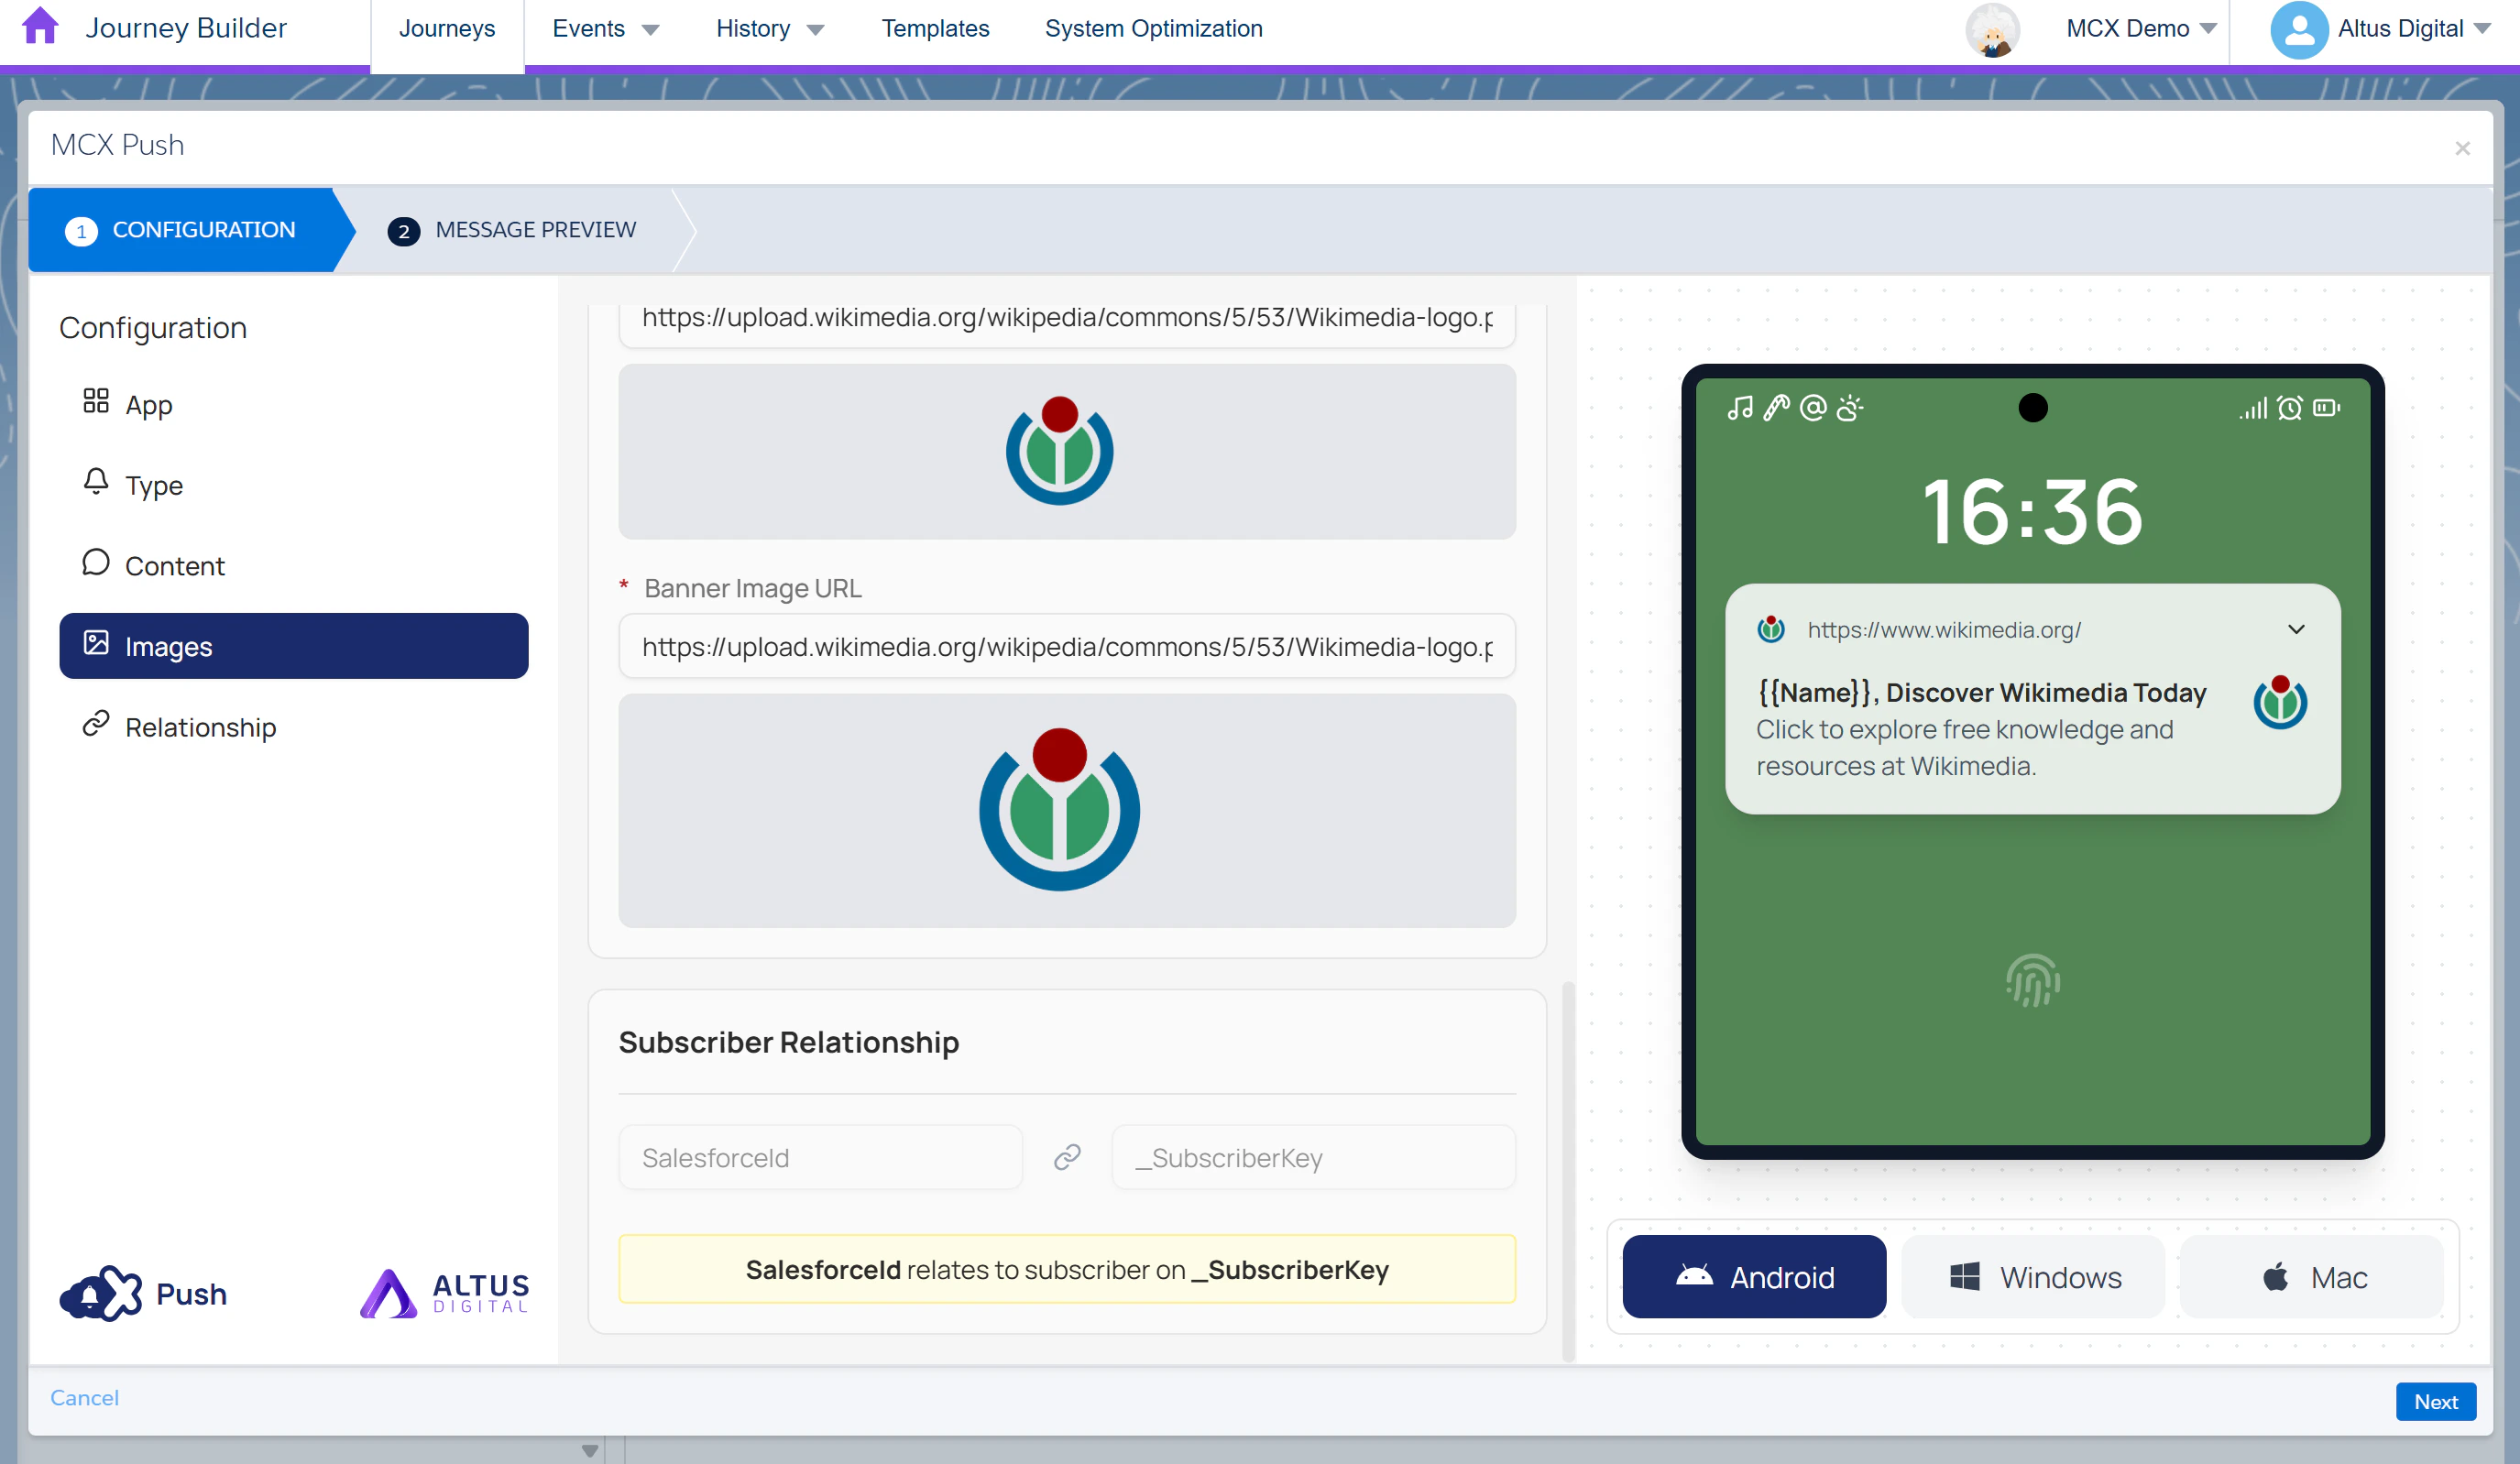
| Images | Sender Icon URL | The main sender icon that represents the brand. (PNG or JPEG supported) |
| Images | Badge Icon URL | The small icon shown on notification. (PNG only) |
| Images | Banner Image URL | The large image displayed within the notification. (PNG or JPEG supported) |
- In the Subscriber Relationship section, verify which field in your Data Extension relates to subscribers and confirm it’s correct.
- Validate the notification appearance across devices by viewing and clicking through the device options:
- Android – Displays mobile notification preview.
- Windows – Displays desktop notification preview.
- Mac – Displays desktop notification preview.
- Click Next to proceed.
Message Preview
- In the Records section, select a subscriber record from your Data Extension. The preview will render the notification using the subscriber’s attribute.
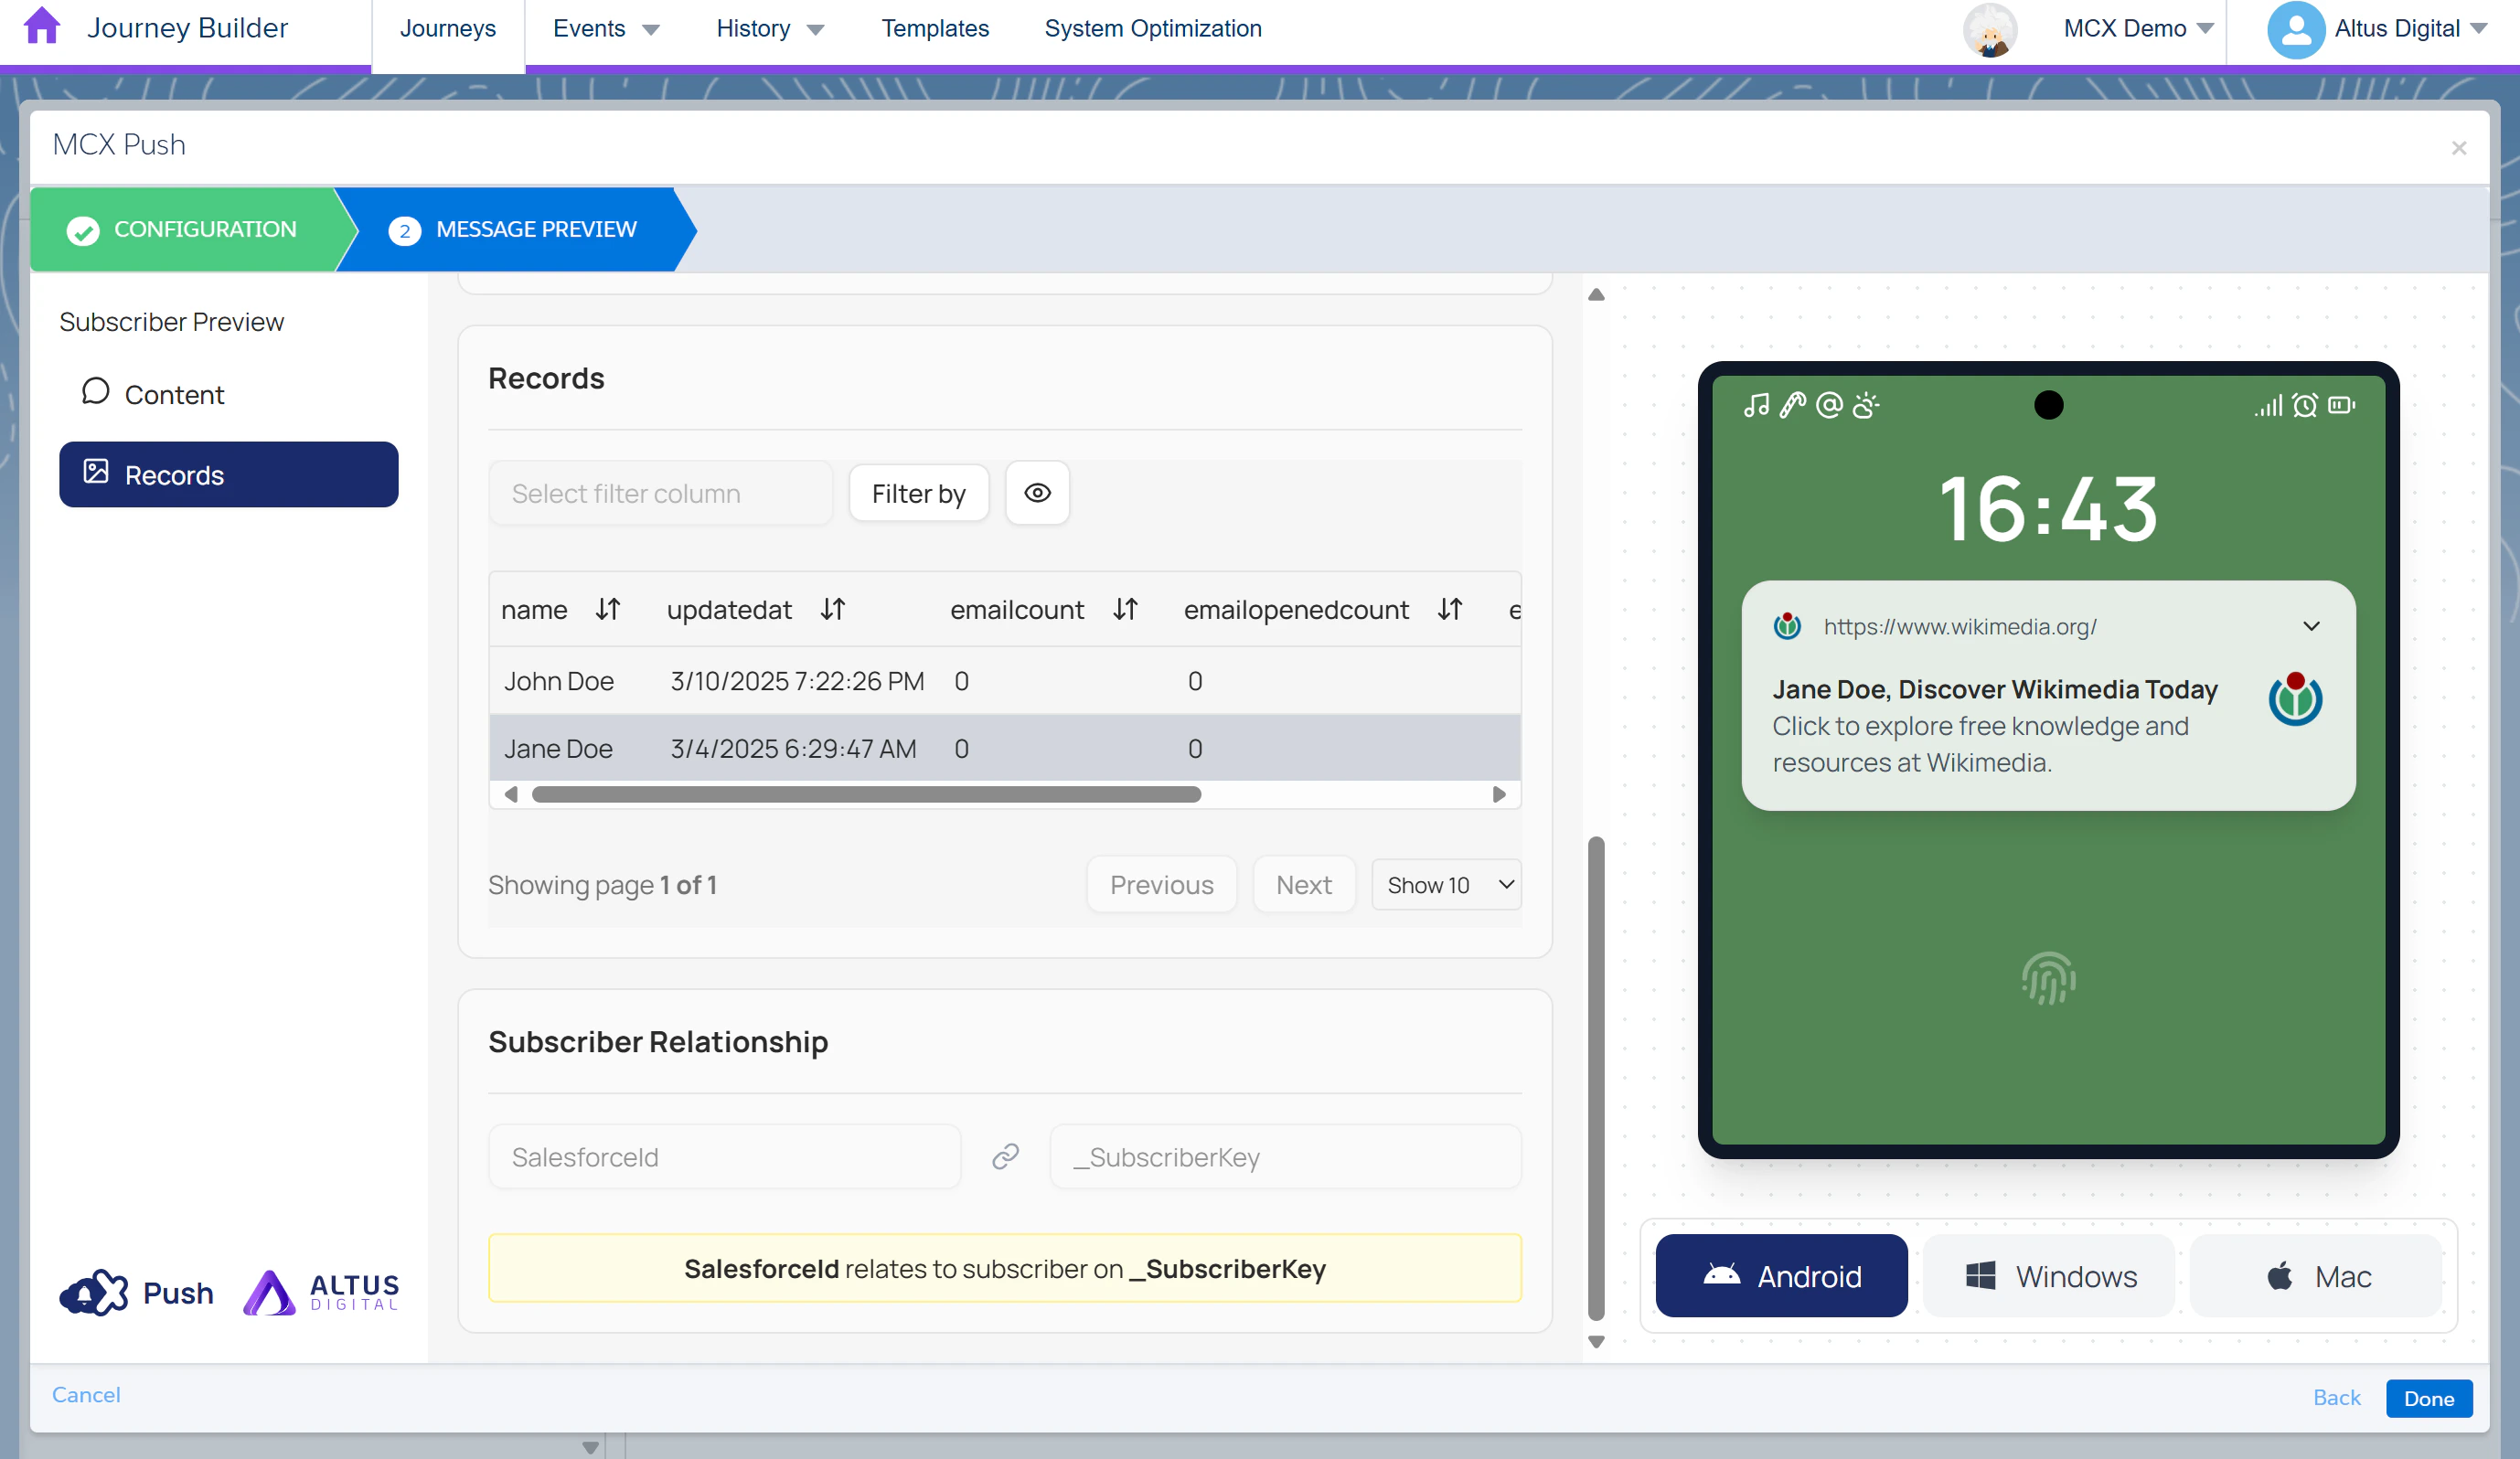
- Review how personalisation strings (if any) appear, ensuring the correct subscriber values are displayed.