Step 1: Select Feature
- To search and retrieve Data Extension records, click Data Extensions from the top navigation menu.
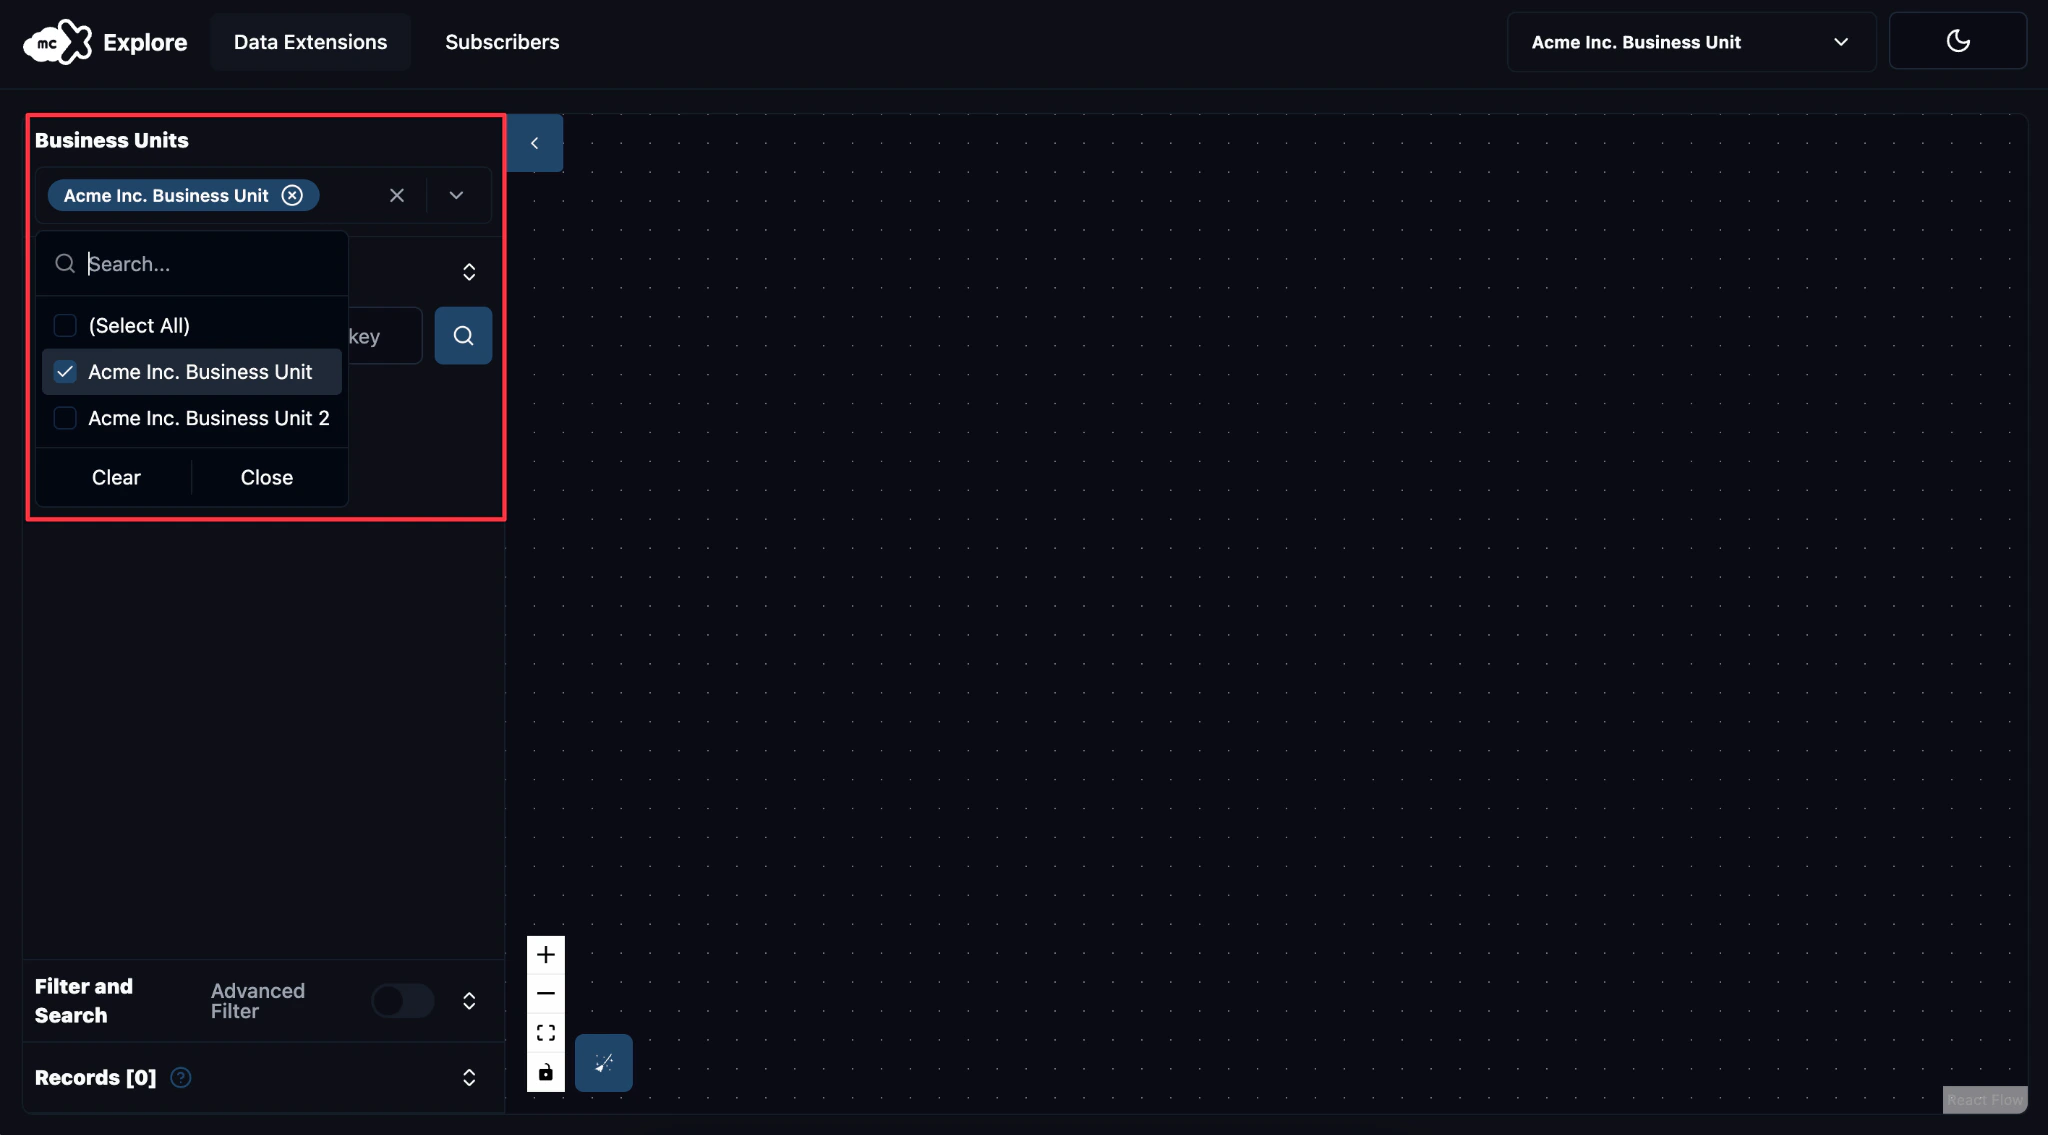
Step 2: Select Business Units
- Begin by selecting the Business Unit(s) from which you want to retrieve records.
- Use the dropdown menu to select one or multiple business units, depending on the scope of your search.
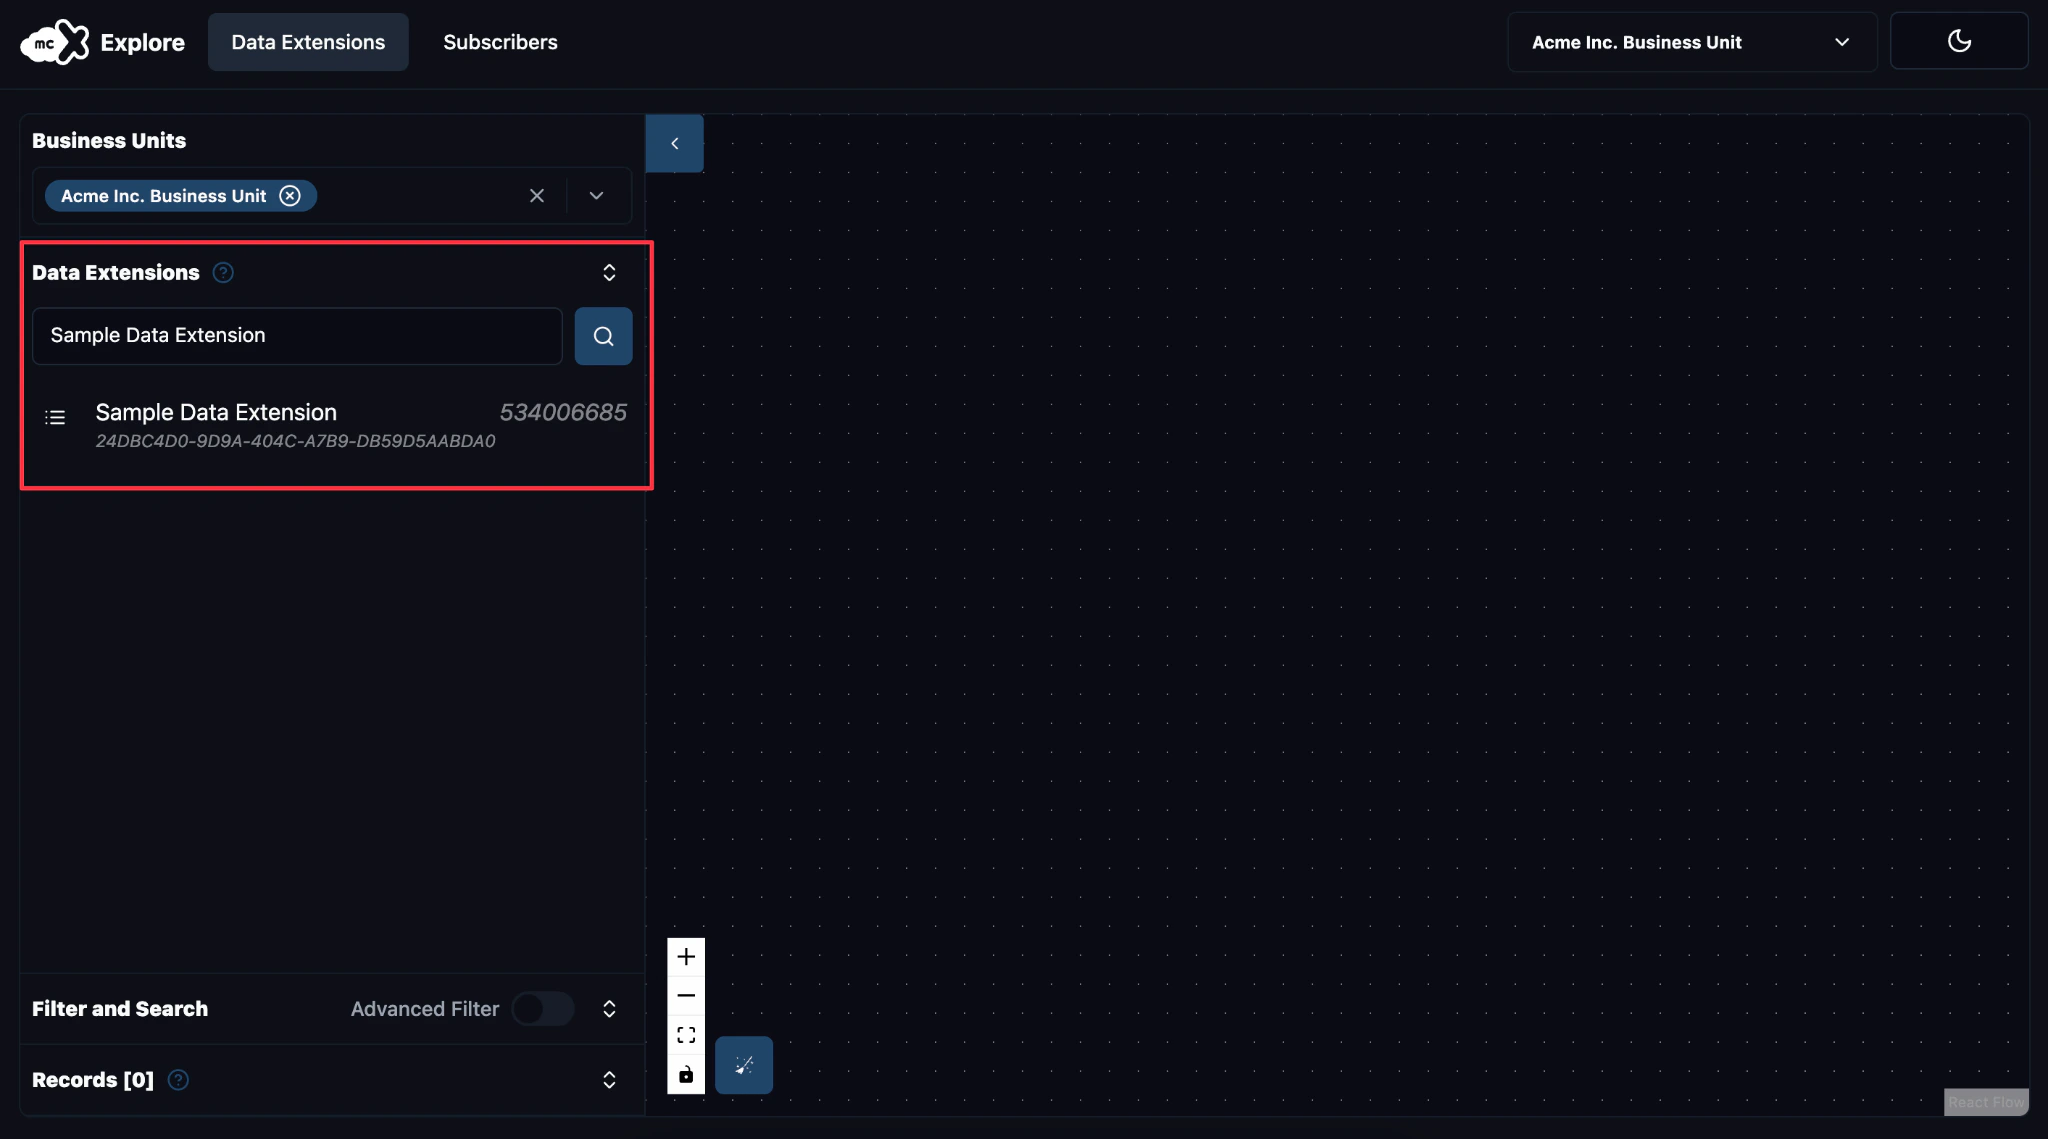
Step 3: Locate the Data Extension
- In the Data Extension Search Bar, enter the name or external key of the data extension you want to query.
- As you type, a list of matching data extensions will appear, allowing you to quickly locate and select the correct one.
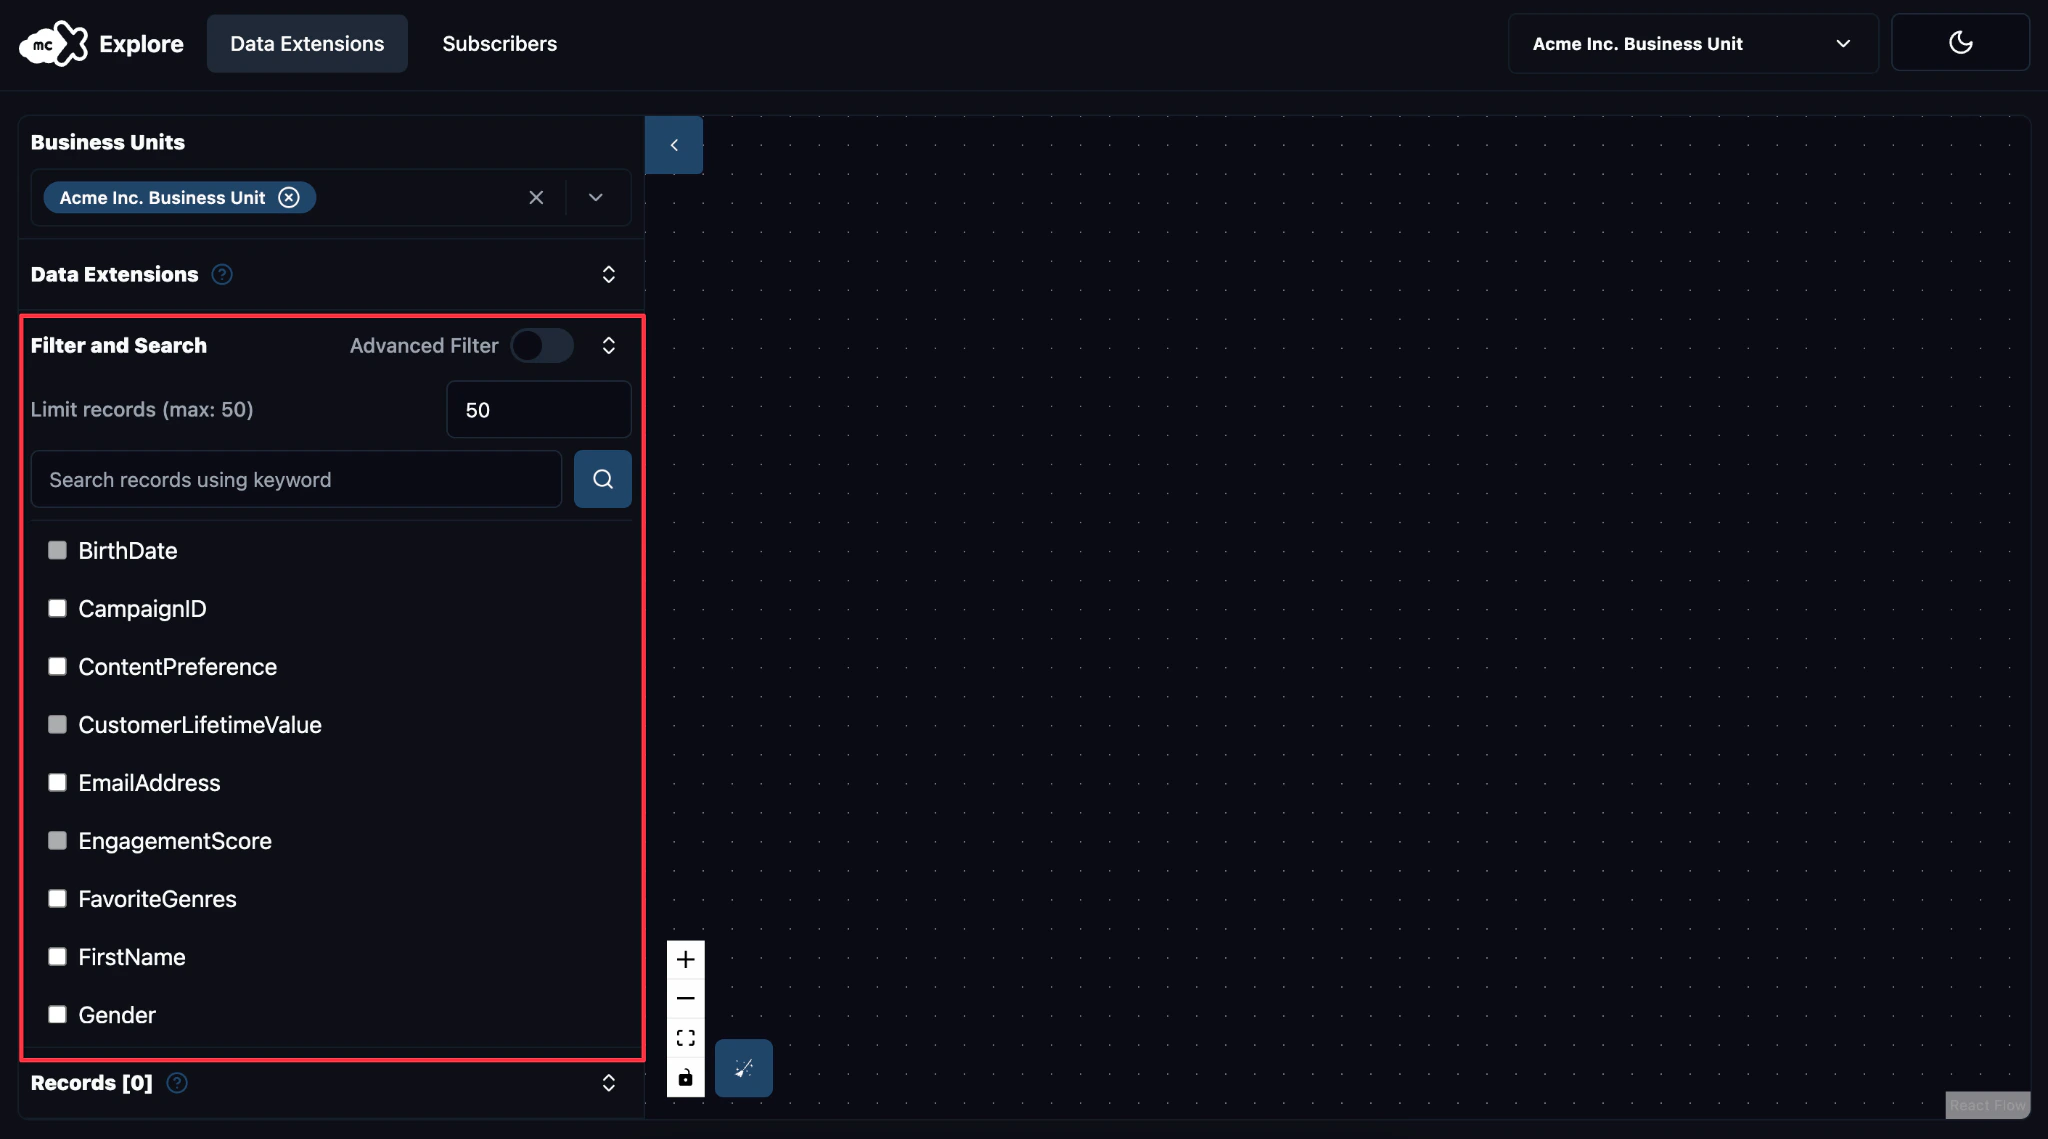
Step 4: Apply Filters to Search
Using Simple Filters
This filter allows you to select up to five fields and perform a keyword search that matches records using the SQL LIKE Operator across all chosen fields.-
Once the data extension is selected, use the Filter and Search Bar to retrieve records based on your specific requirements.
- Enter the value of the attribute you want to filter by (e.g. “Email” or “Subscriber Key”).
- Use the checklist below the search bar to select the specific field(s) where you want to search for the value you’ve entered.
- Click the Search button next to the search bar to retrieve the filtered records.
- The matching records will be displayed in the Records Tab, ready for analysis.
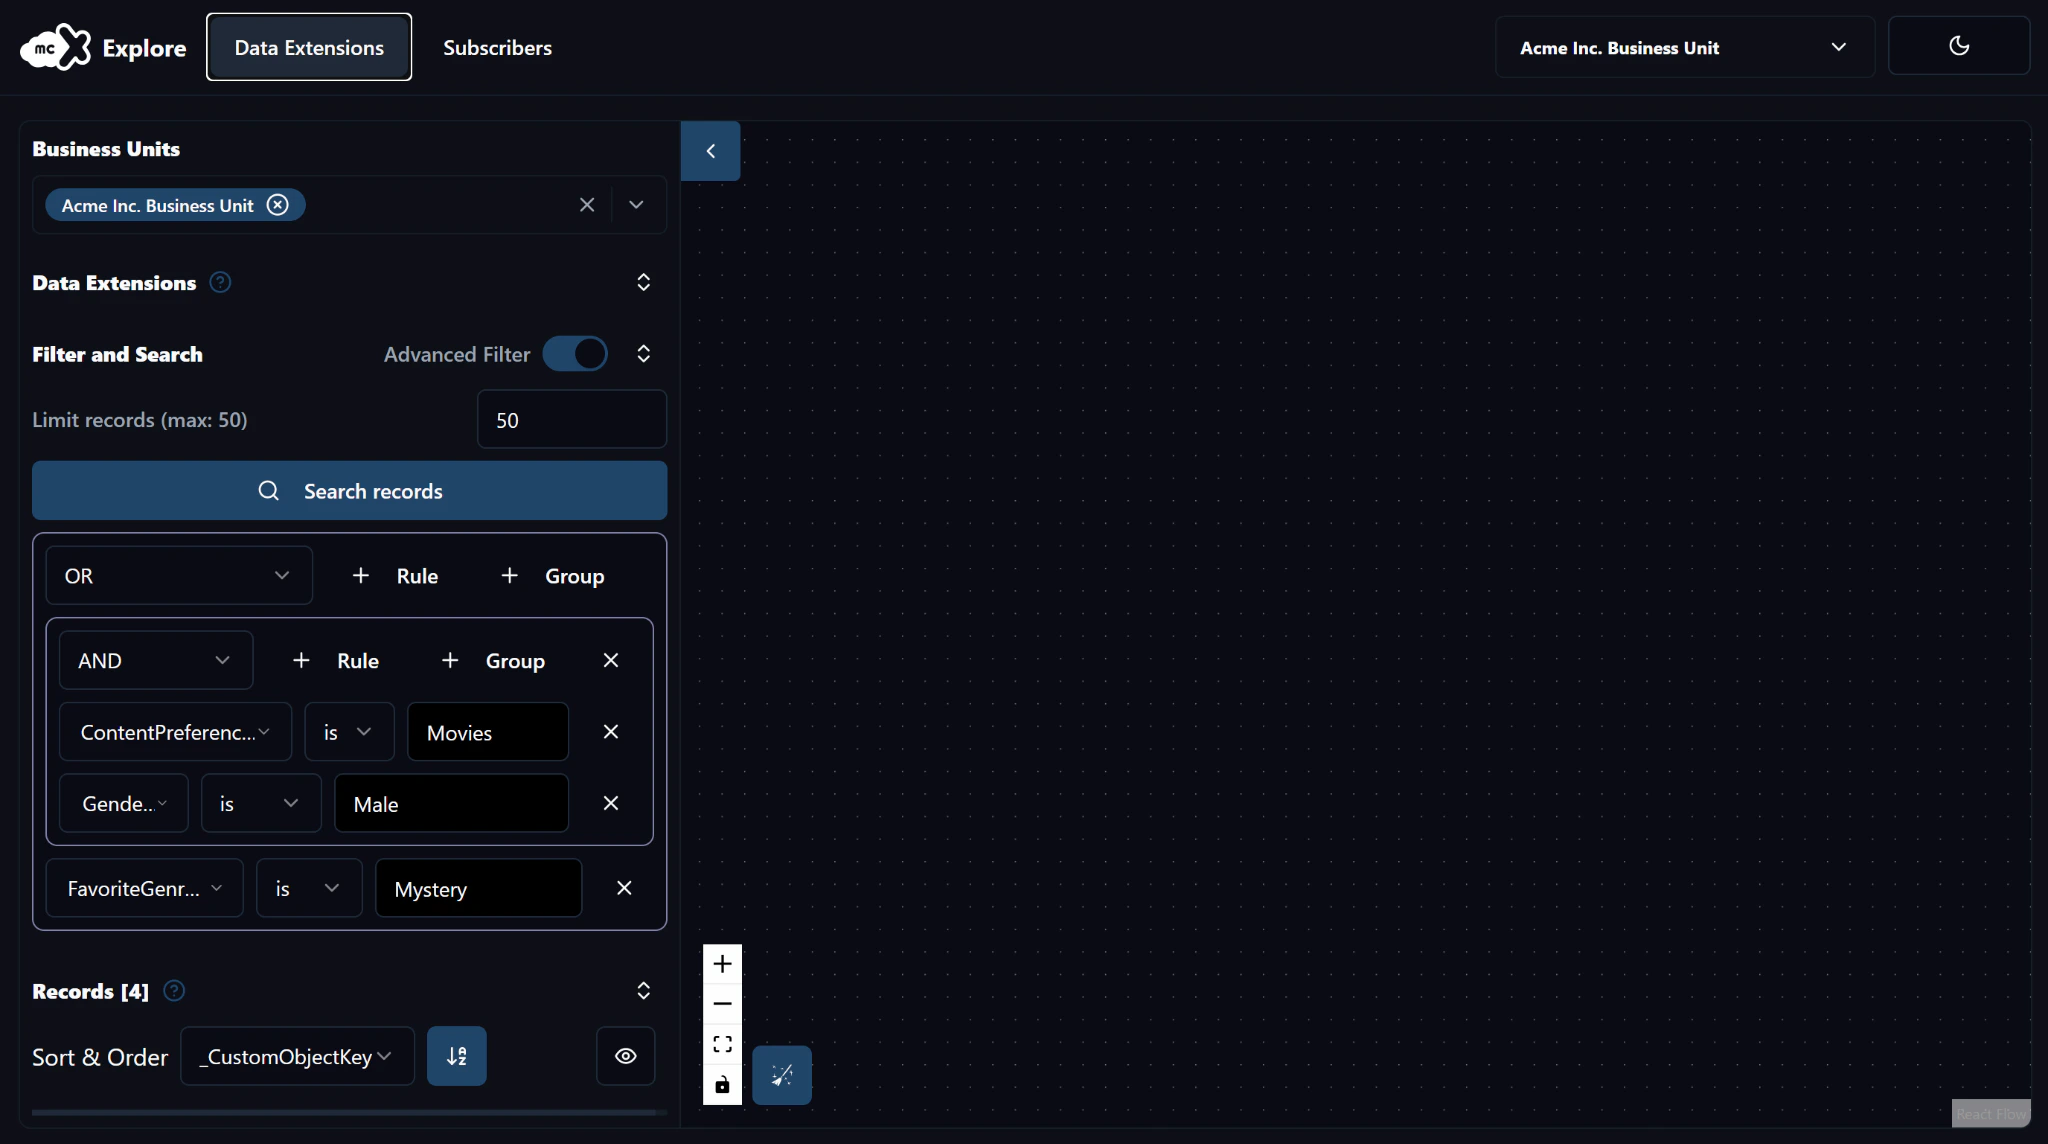
Using Advance Filters
The Advanced Filter feature in MCX Explore allows you to apply complex filters, custom operators, and groupings to your search, providing greater flexibility and precision.- Toggle the Advanced Filter to access options for operators, rules, and grouping logic.
-
Select an Operator in the Query Builder dropdown:
- AND: All conditions must be met.
- OR: At least one condition must be met.
-
Click Add Rule and configure:
- Attribute: Choose a field from your Data Extension.
- Comparer: Select an operator (e.g., IS, IS NOT, IS SET, INCLUDED IN).
- Value: Enter the specific value or range to filter by.
- To further refine your search with Grouping Options, click Add Group to combine conditions for precise filtering. Example: (Condition 1 AND Condition 2) OR Condition 3).
- Click the Search records button to retrieve the filtered records based on your advanced filter criteria, which will be displayed in the Records tab.
You can adjust the size of the sidebar to enhance visibility, making it easier to view and navigate through different fields and filters.
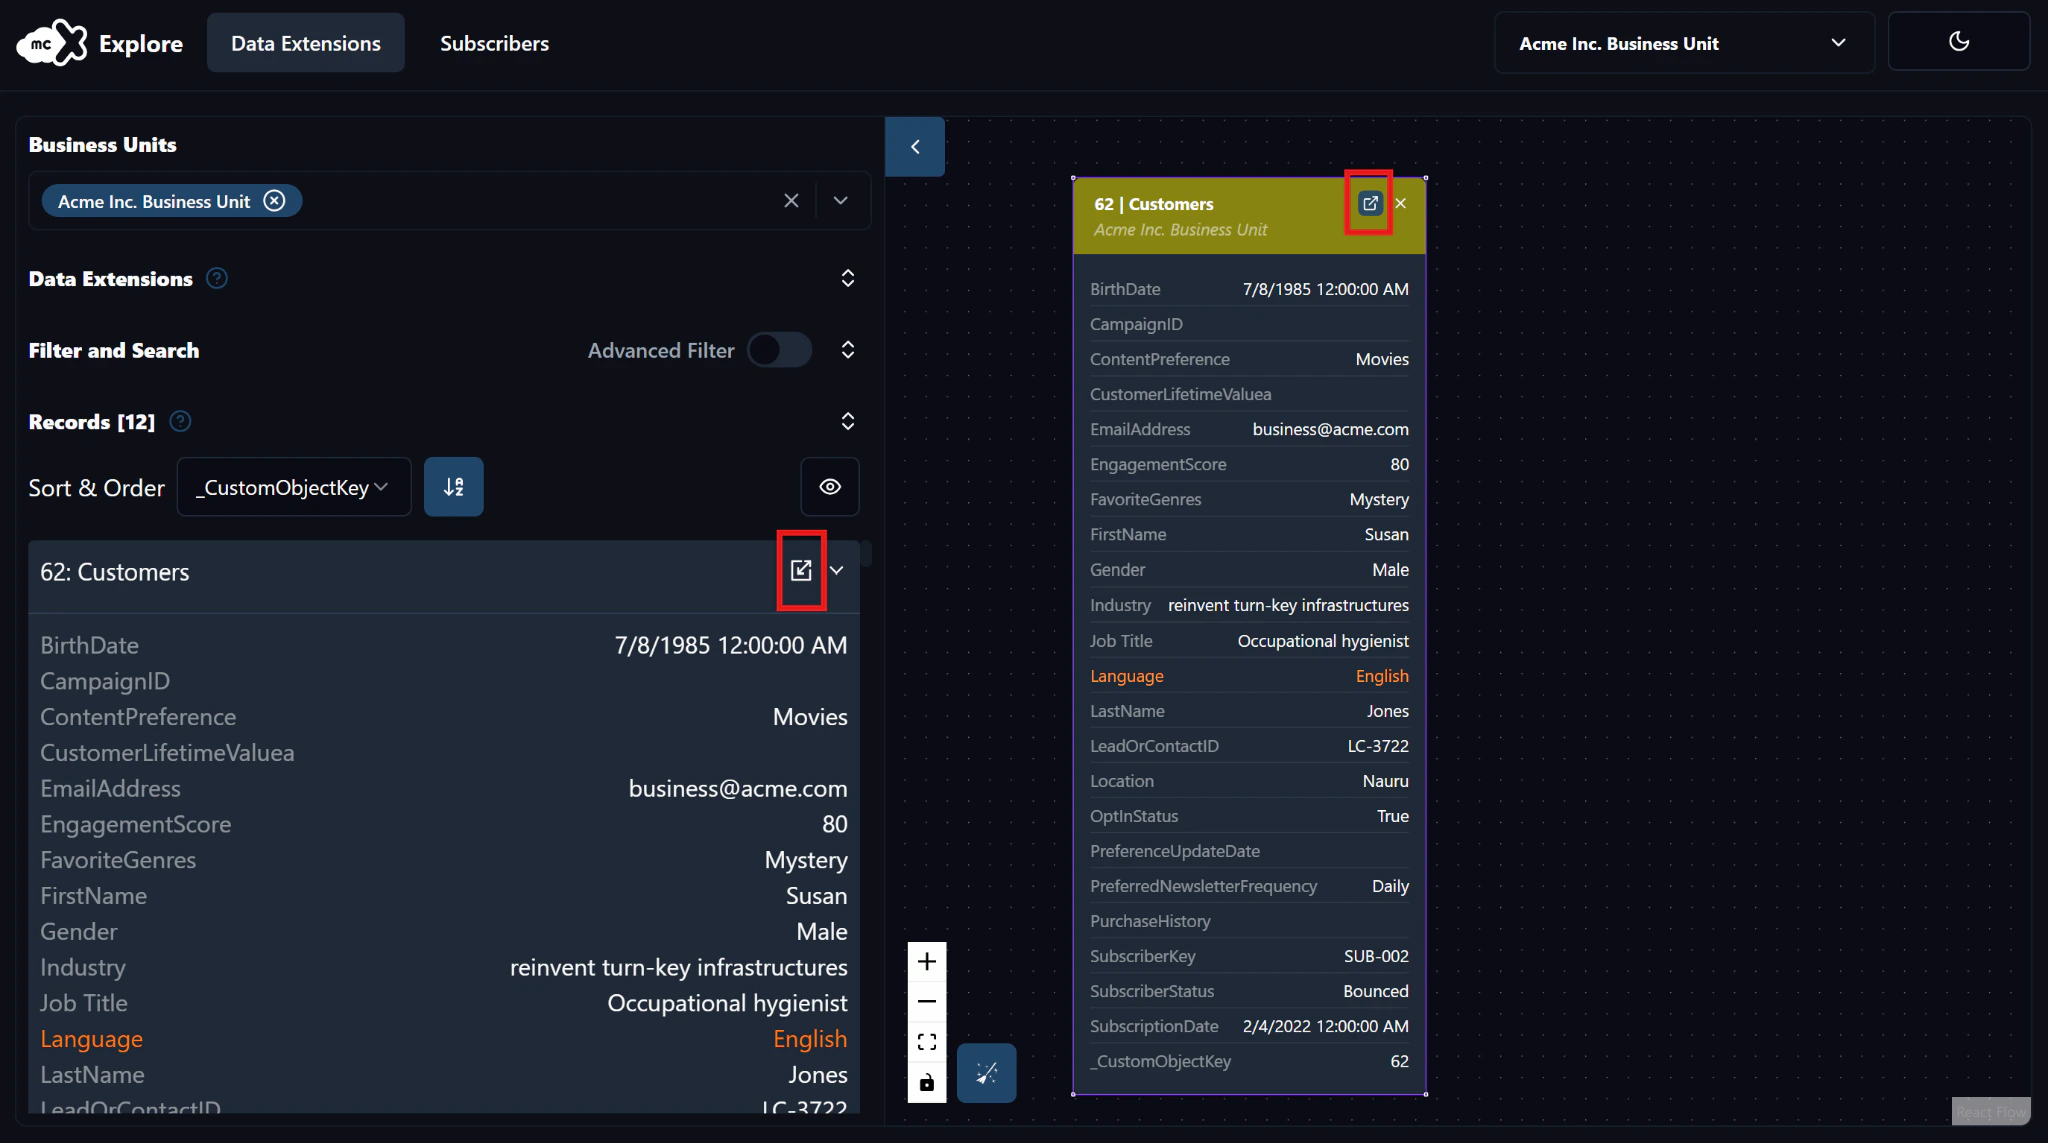
Step 5: Investigating Results
Once filtering is complete and you have your results, the next step is to analyze the data for insights and patterns.- Select a record from the results to display it on the Canvas for closer examination.
- Click the View in Canvas icon next to the Data Extension’s name to move records around the Canvas and to organize and compare them more effectively.
- Once the data extension is on the Canvas, click the View Data Extension in SFMC icon, located on the top-right corner, to view more details and properties.
Records are color-coded based on their source Data Extension, making it easier to distinguish between different datasets.